
All About Half Rectangle Triangles
Half Rectangle Triangles are a must have for modern quilters, but they can also be confusing, challenging, and frustrating! Don’t worry - after reading this you’ll be a half rectangle triangle pro.

Method 1 and Orientation
A common mistake when making half rectangle triangles is to think that they’re similar to half square triangles. Because the width to height proportion is different though, they have to be constructed differently. Another important difference to keep in mind is that orientation matters.
Let’s run through an example. This is the first method of making HRTs, which makes 1 at a time (but you cut the fabric for 2). The first thing you’ll need to do is cut two rectangles, and then cut those rectangles along the diagonal.
But it’s not quite that simple. Remember before when I said orientation matters? Look at the diagrams below, and think about what the end result would look like if you cut each rectangle along the line shown.

Let’s find out! Here’s the general steps to construct your HRT. Using differently cut orientations will result in different HRTs.


1) Line up your two complimentary cut triangle pieces.
2) Overlap one of the triangles with the other as shown, leaving a 1/4” overhang on each end for a seam allowance.
2) Sew the two triangles together, then open, press, and trim.
The actual construction of HRTs is pretty straightforward, once you figure out what orientation you need. The next part to master is trimming!
Method 2
This is a method that is more similar to how HSTs are constructed, with a twist. Literally. All you do is twist the top rectangle!

1) Figure out what orientation you need you HRT to be. Draw a line on the diagonal for your desired orientation on the top rectangle.
2) Lay your top rectangle over your bottom rectangle twisted so that the corners line up.
3) Sew a 1/4” seam on both sides of the line.
4) Cut along the line, then open, press, and trim! Ta da, two HRTs.
Trimming
This is where HRTs trip a lot of people up - including me in the past! Trimming HRTs can be a bit tricky, and I have two different methods to try. The first method works best with smaller HRTs, while the second method will work for HRTs of all sizes. I recommend using the second method for most of my Mountain patterns that use HRTs (Sisters, Cascadia, Asteria, etc).
Method 1
This might sound complicated or hard to follow at first, but the key is to practice practice! Grab some scraps and give it a try.
1) Lay out your HRT vertically. Center it on a line on your cutting mat so that half of it is on one side of a line and half of it is on the other. Trim your vertical sides so that the width of the HRT is your desired width. In this example, I wanted a 3” width.
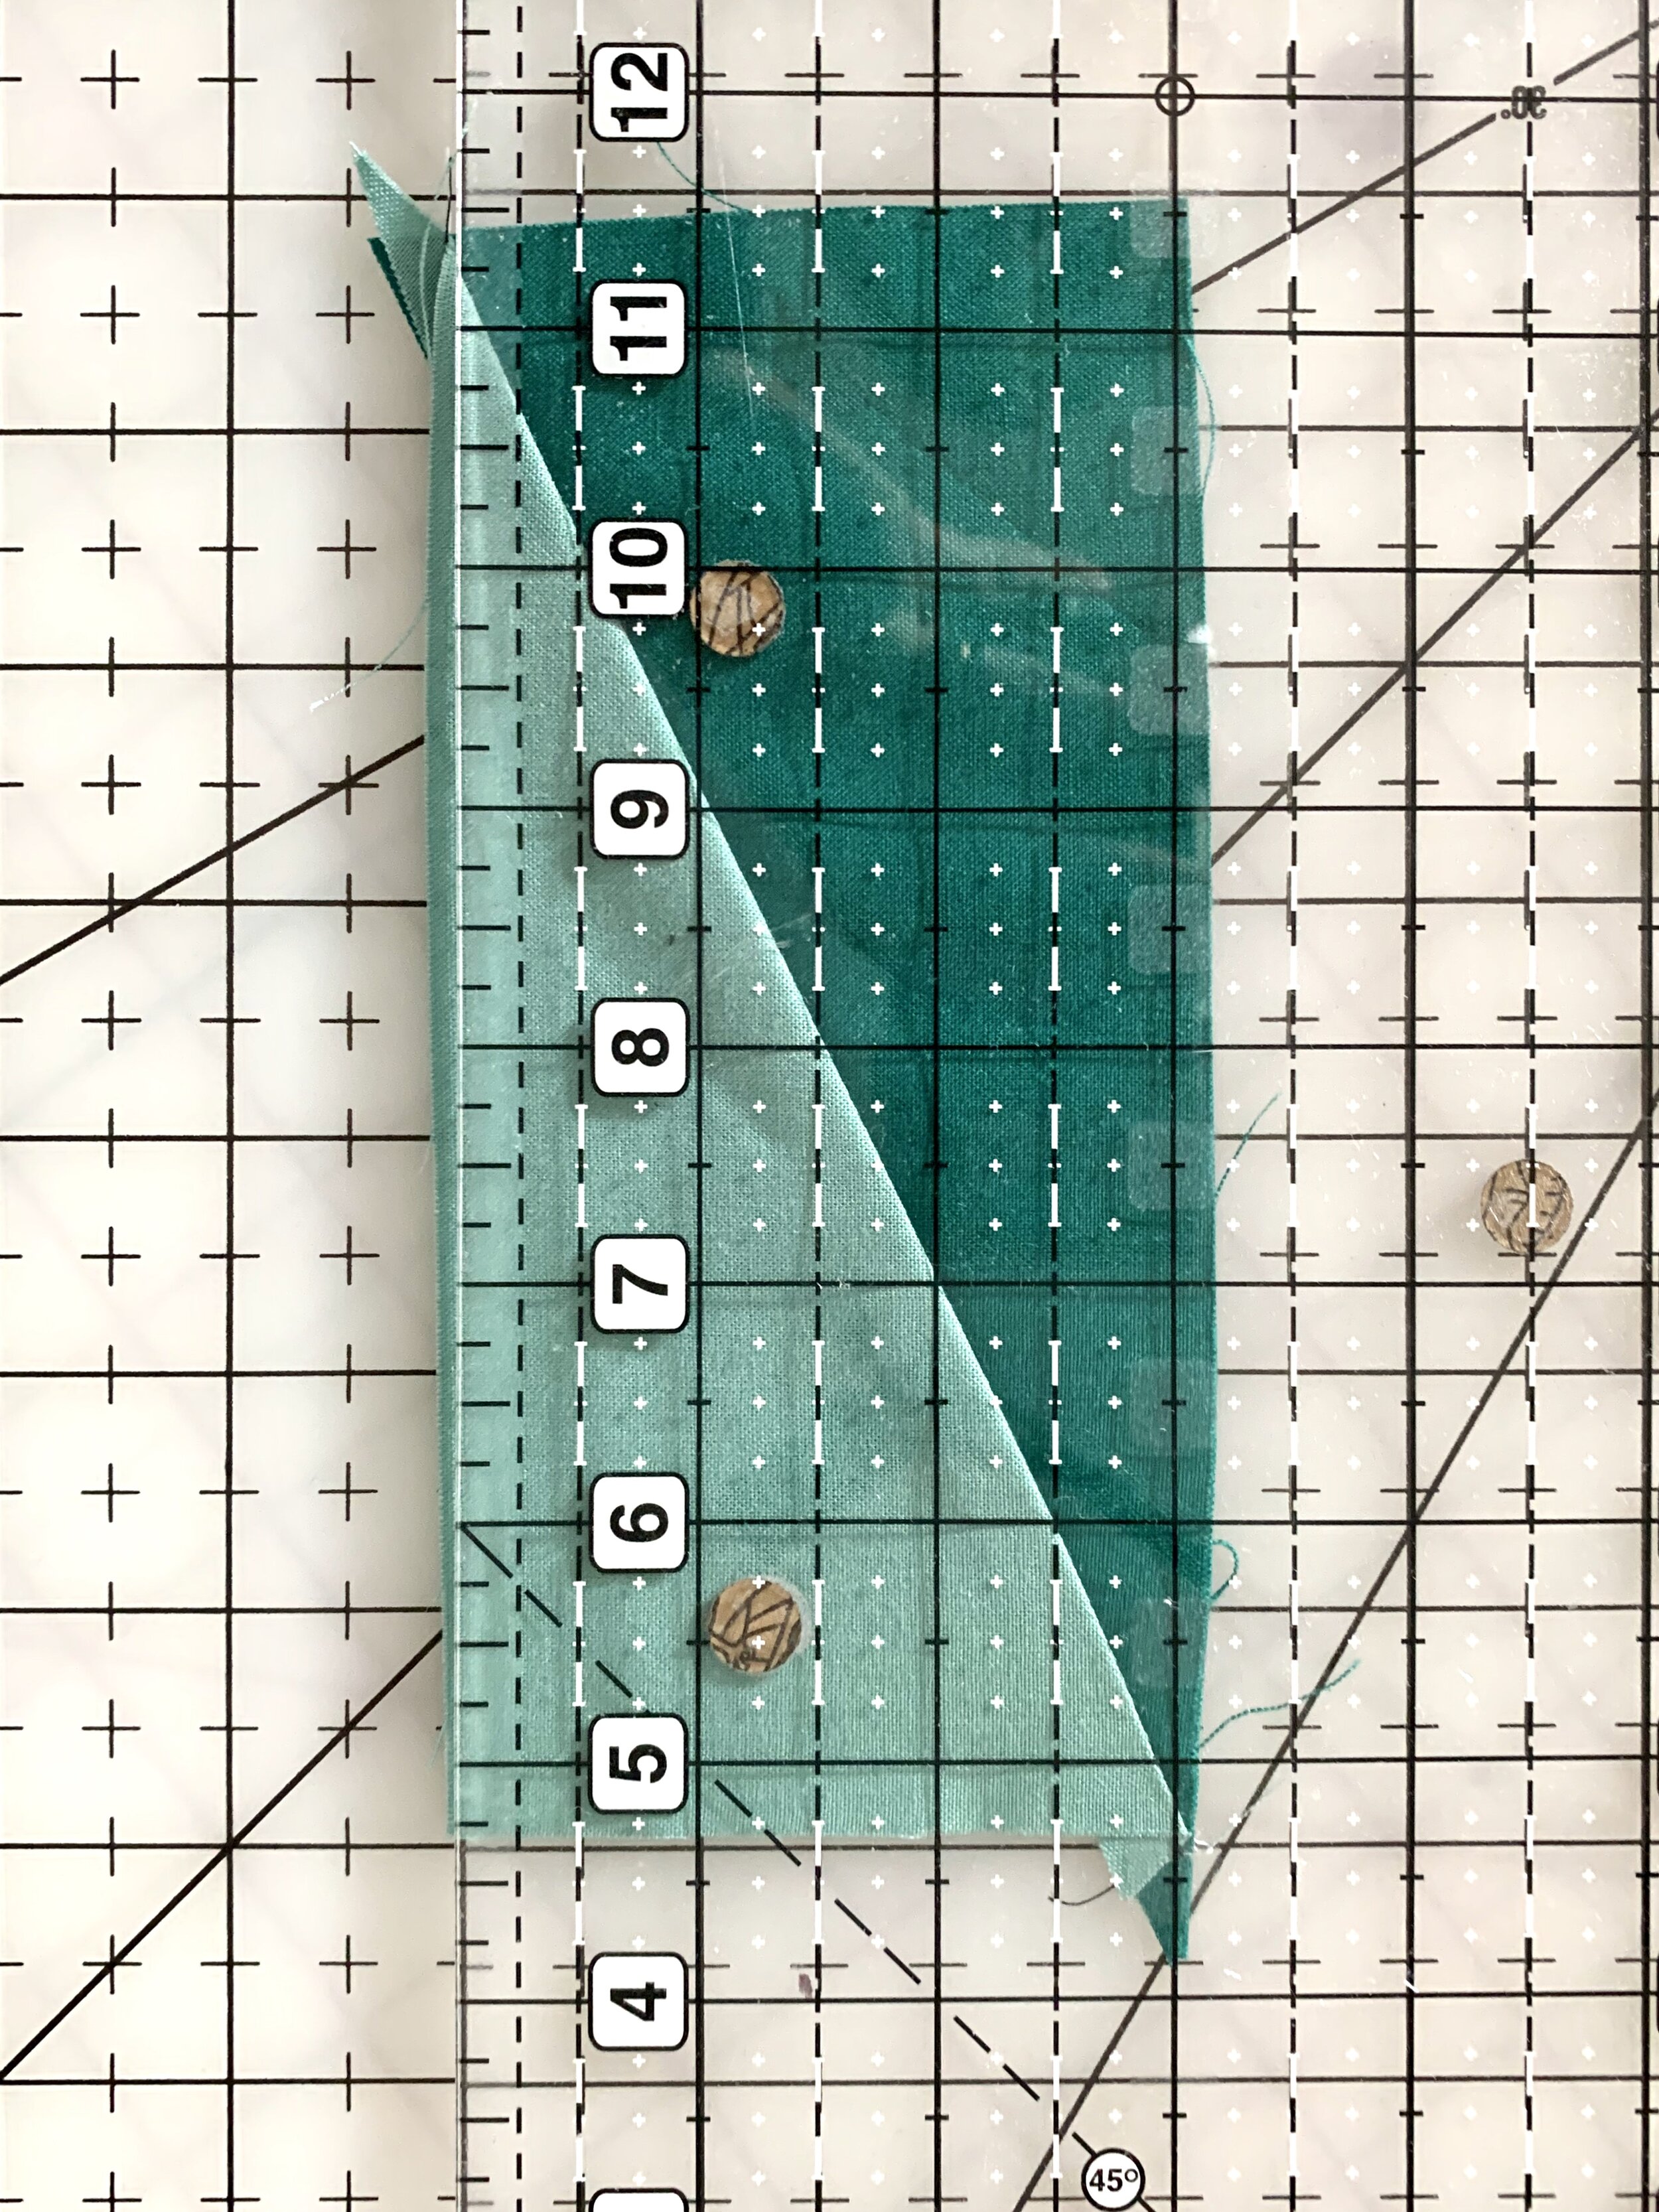

2) Here’s the crucial part! Look closely at your ruler, and see if there is a square or guide that shows a 1/4” square in the corner of the ruler. If not, you can create one yourself but running tape along the 1/4” mark on each side of the corner, creating a square where they intersect. Line up that square with the seam between the two fabrics on your HRT, and trim! In the picture below, I’ve added a red corner to highlight where the square that I’m lining my seam up to is. This is important because it will allow you to have perfect points- the corner of the square represents where your seam allowance will fall when you are sewing.
Do this on both sides of your rectangle! You may need to fudge this a bit - sometimes they don’t line up perfectly with your desired length. The goal is to wind up with a block that is as close to your desired size with seams as close to the 1/4” squares as possible. This is why practice is important - you’ll get a feel for how to adjust when you need to!


Tada! A perfectly trimmed HRT.

Method 2
For this method, we will be creating a paper template to help us with our trimming!
1) Cut a piece of printer paper to the trim size of your HRT. For example; if your pattern says to trim an HRT to 5” x 10”, you will cut your paper down to that size. If your pattern requires a larger HRT, then tape multiple sheets together to get the appropriate size.
2) In each corner, mark 1/4” in from the edge. You can either mark just a single dot 1/4” in from the top (or bottom) and side edges, or you can draw a little box as shown below.

3) Draw a diagonal line across the template, beginning not at each corner, but at the 1/4” markers you drew in the previous step. These lines should not extend to the corners of your paper template, but wind up in from the edges as shown.

4) To trim, place these templates over each of your HRTs. Make sure that the line you drew is laying directly over your seam line, and that the seam intersects the 1/4” marks as shown. Shift the template as needed so everything lines up properly, and then trim around the paper template for a perfectly trimmed HRT!

Math!
HRTs can be divided into two groups: those with a 2:1 ratio (meaning the finished length is twice as long as the finished width), and all other sizes! You can make a HRT with almost any proportion you want, but the catch is that there’s going to be some guess work.
For 2:1 HRTs, the equation for the starting rectangle size is:

For other proportions, there’s isn’t a guaranteed equation because there can be so much variance in the angles. However, in my experience, starting with this equation will usually get you pretty close. If you’re trying to develop a specific HRT size with a ratio that isn’t 2:1, make a test block using this formula. Then, adjust the measurements as needed!
Alternatively, you can make your own templates for specific HRT measurements using this tutorial. If you’re going to be making a lot of HRTs, this is a great way to go!
Rulers

Rulers can be a great way to avoid some of the challenges of HRTs. This ruler allows you to make many different sizes of 2:1 HRTs, and because of the rounded edges you don’t need to fiddle with lining the points up perfectly to get a 1/4” seam allowance.