
How To Sew Curves
I have eagerly been awaiting this guest post for a while, not just because Lorna of Cloth and Crescent is one of my favorite quilters ever, but because I have a dirty secret: I’m afraid of sewing curves in quilts! Which is ridiculous, because I started out with garment sewing and have been sewing arm holes since I was 10. Are you ready to conquer your own curve fears, or just sharpen your skills? Read on!
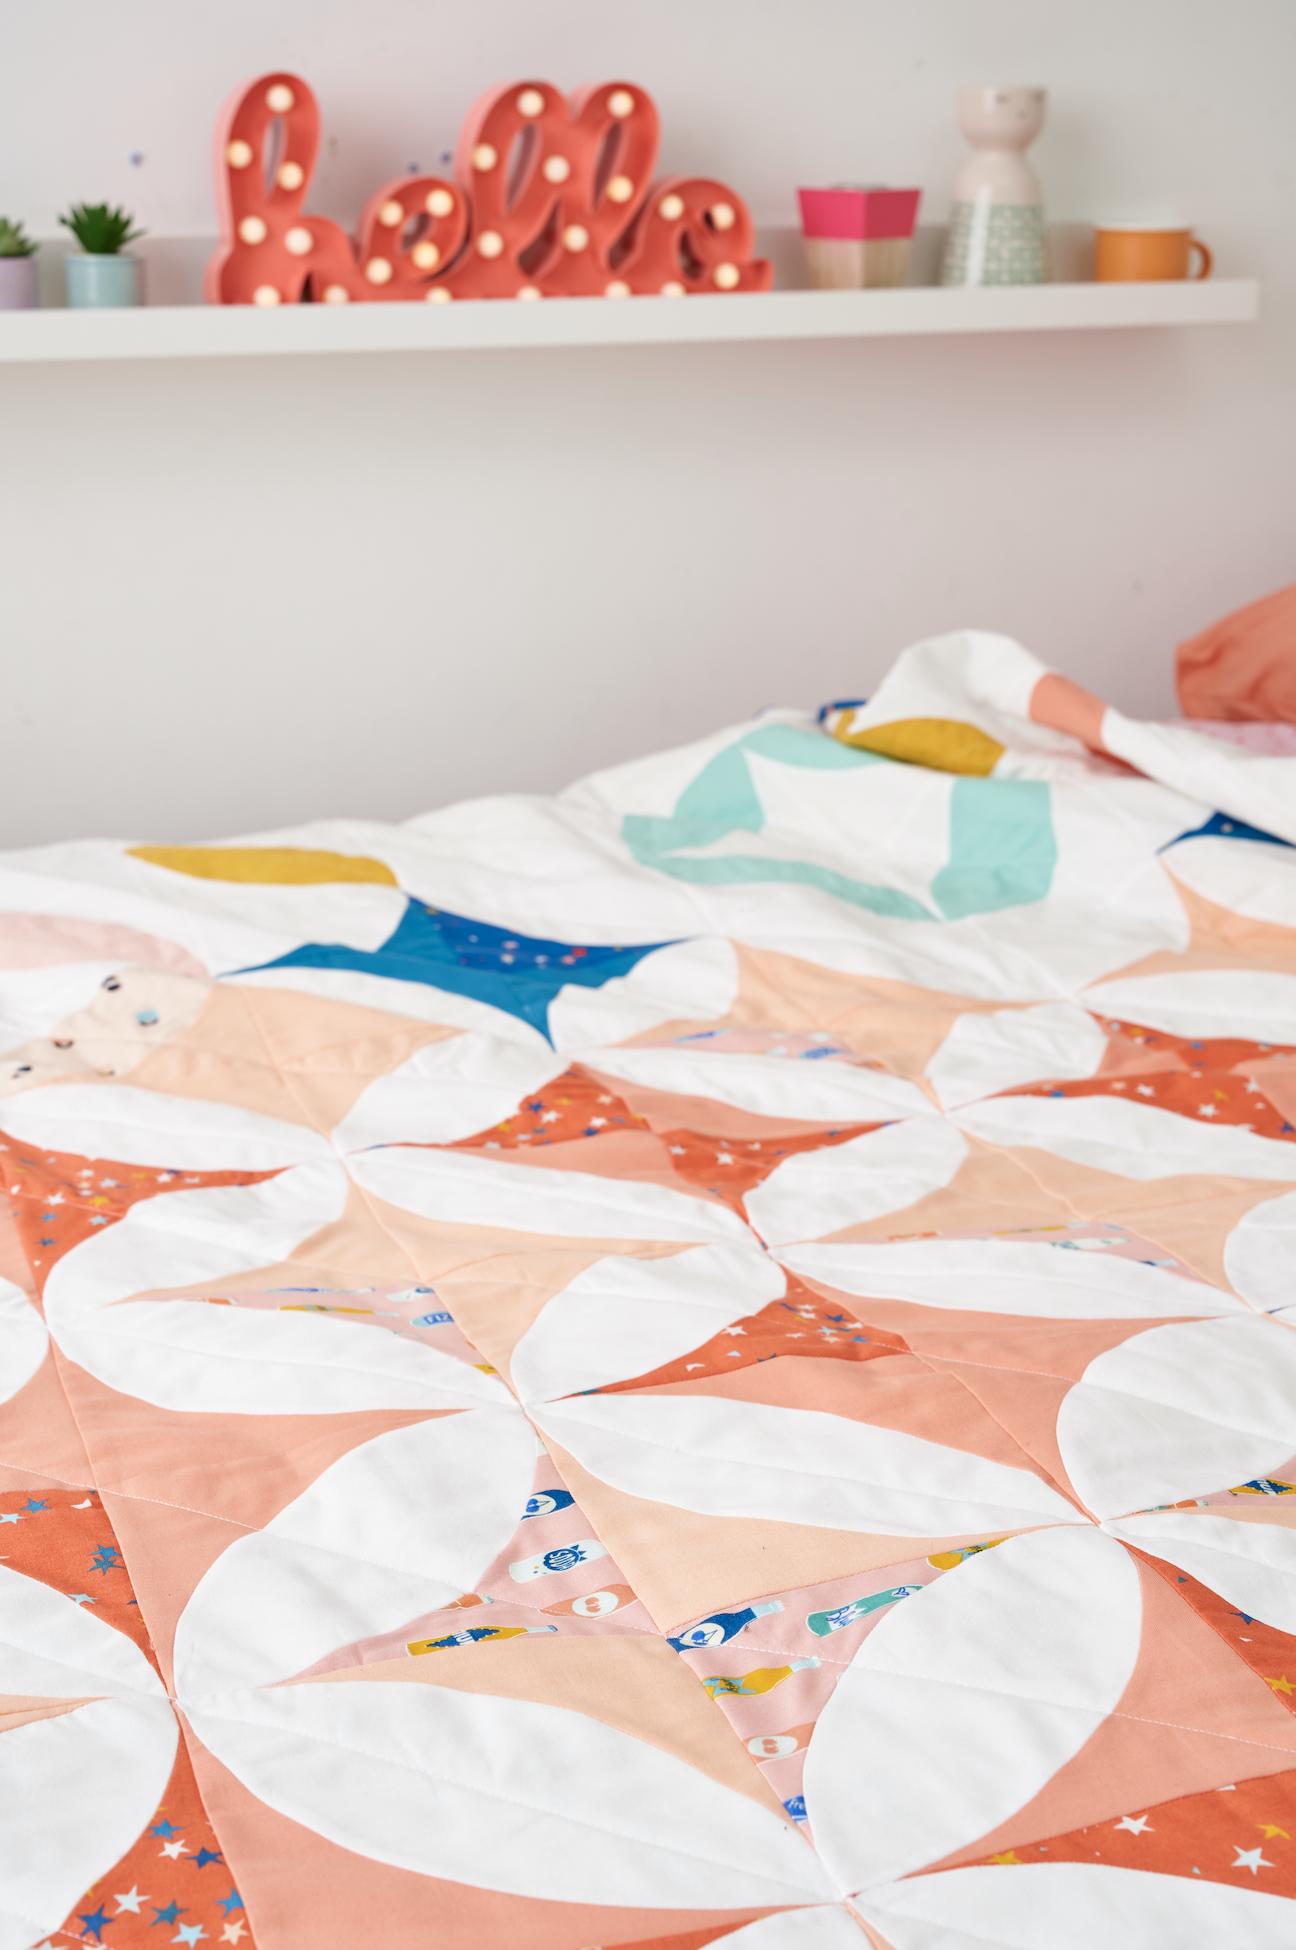
Orange Soda pattern by Cloth and Crescent (pattern in LP&Q 78)
Let me introduce myself with a bit of a disclaimer: I’m a horror film fanatic. If there’s a killer clown, a creepy doll or a particularly perturbed spirit, I’m all over it. So I suppose it was only natural that I had an instant love affair with the ‘scariest’ technique in patchwork – sewing curves.
First things first, let’s address exactly why us quilters have an innate fear of a slight swerve in our seams. Everything we’ve perfected so far has been based purely on the straight and narrow: we want perfect points and smooth lines, and don’t even consider not using a precise ruler and rotary cutter! Straight lines are easy; straight lines are our friend. But did your mumma never tell you that it’s cool to have more than one friend?
I’m here to give my very own public service announcement: curves are easy too! Arm yourself with a handful of pins and a healthy dose of courage and let’s tackle this technique together.

PapperSaxSten templates (available here )
We’ll start things off easy with a simple Drunkard’s Path block. You’ll have two pieces: an arc (white) and a curve (peach), both of which you can cut using templates or special curved rulers, like this one by Creative Grids.

Take each piece and fold in half to find the centre point. Finger press the centre, open out and place the arc on top of the curve, matching the creases like so. Now put a pin in it.

Match up the ends of the arc with the edges of the curve, and pin here too.
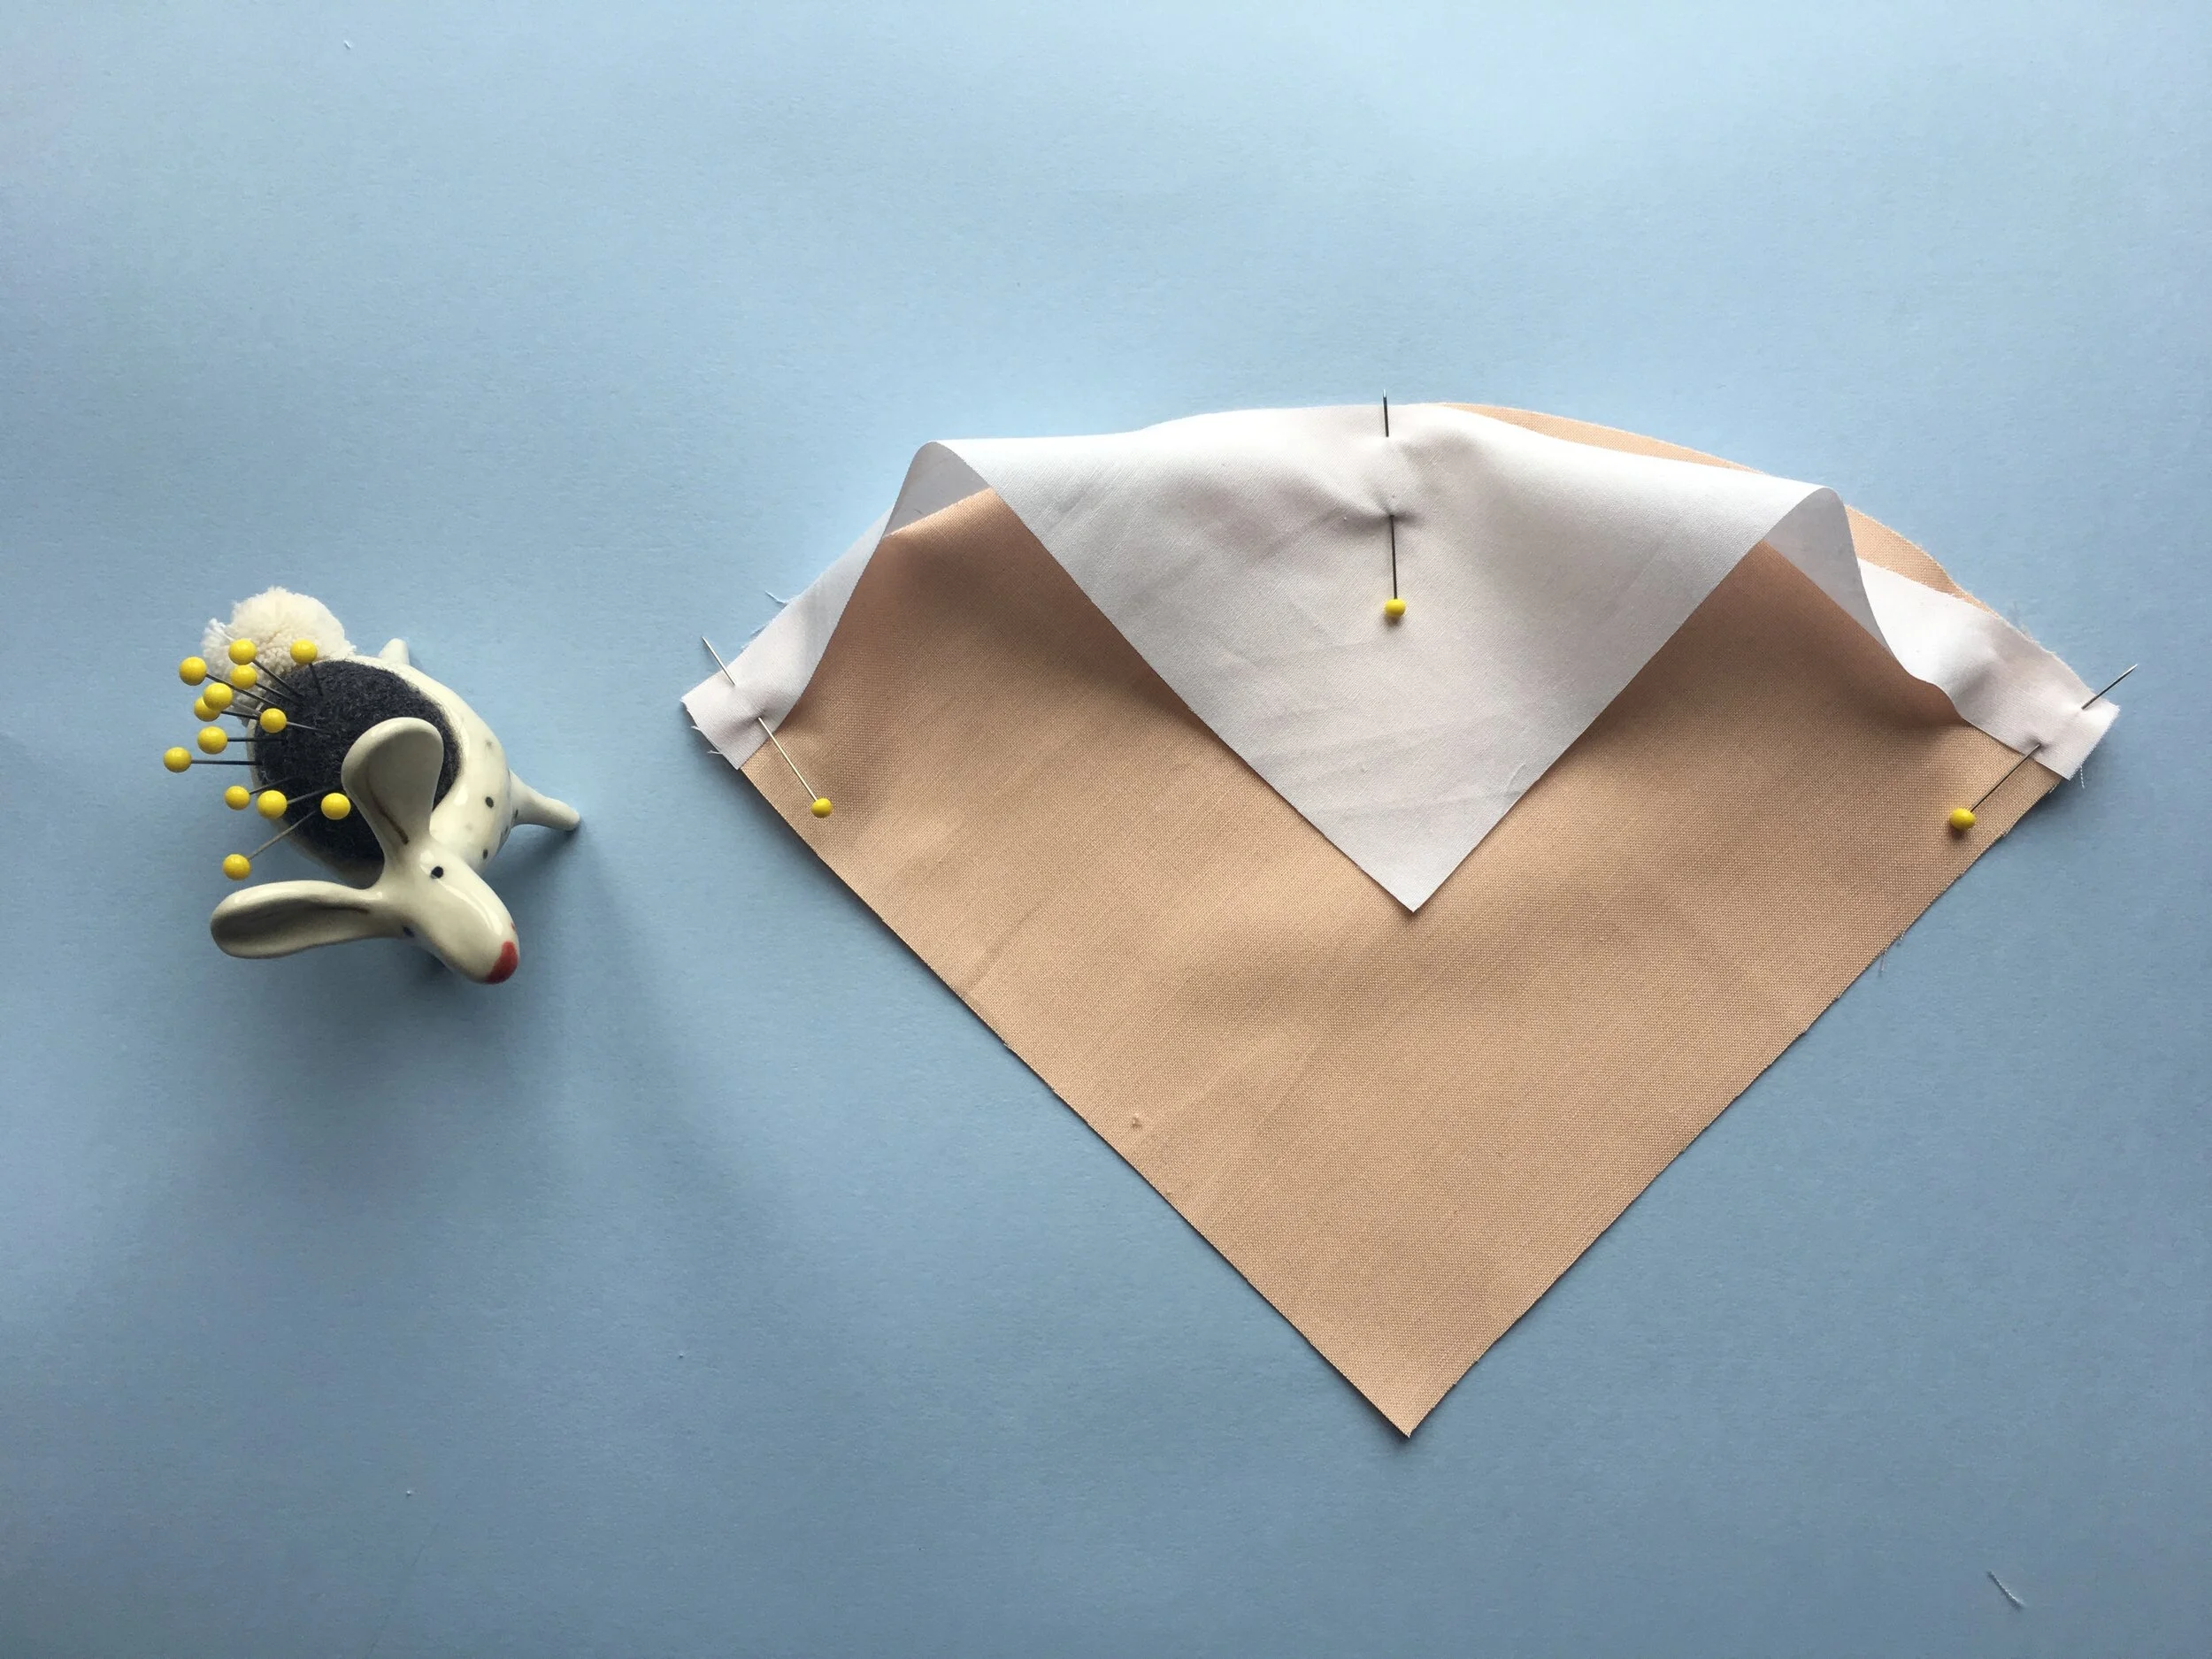
Ease along the curve, pinning together between these points. I’ll let you in on a secret here: there’s no hard and fast rules on pinning. If you need 20 pins per curve, have a field day; if you’re feeling bold and want to go totally pin-less, that’s ok too.

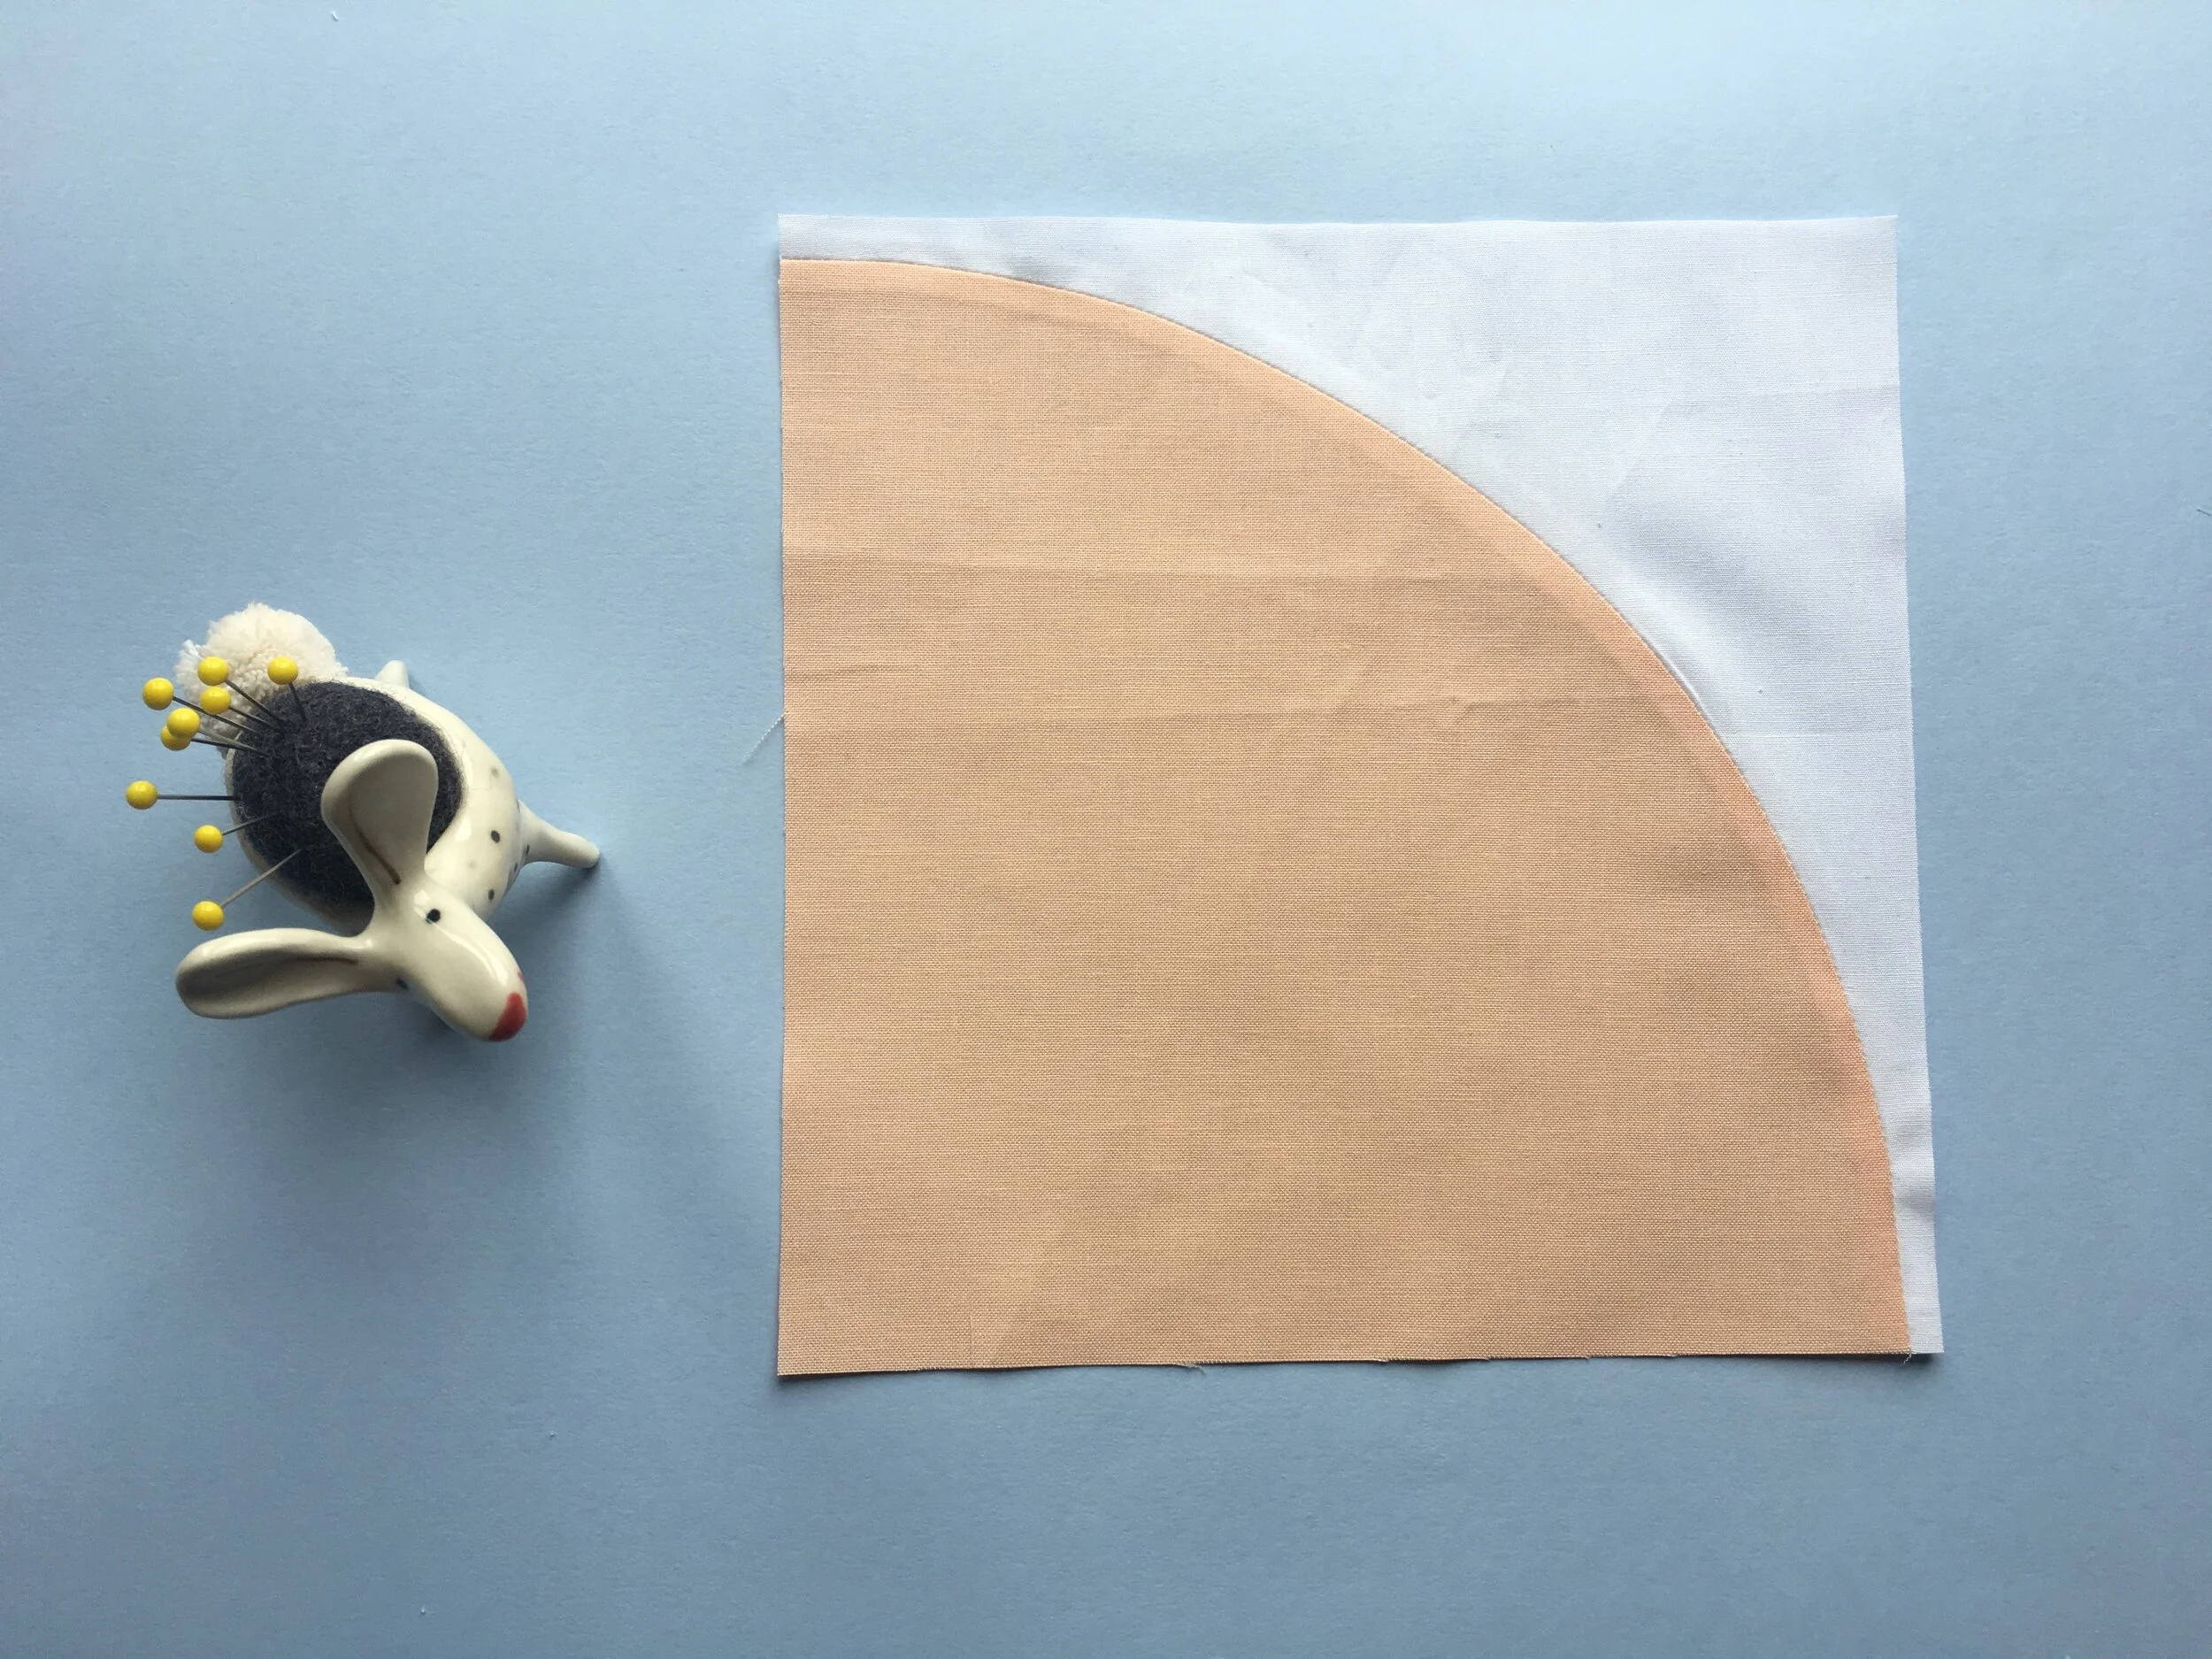
Now take it to the machine. With the arc piece on top sew along the curved edge, working slowly to avoid any puckering or stretching and removing the pins as you go. It may help to keep your needle in the down position and stop regularly to pivot your foot. The more curved seams you sew the speedier you’ll get!
Once your curve is sewn, press your seam (I like to press mine open), and trim to size. Ta-da! It really wasn’t so scary after all, was it? (Photo 5 and 6)

Now that you’re cool, calm and confident at sewing a Drunkard’s Path block, may I point you in the direction of some other styles of curved block? Double Drunkard’s Path and Orange Peel are two of my favourites – you can get to know them a little more in my video below.
And the next step? Why not try out my Freshly Squeezed quilt?! It’s got all three of the blocks we’ve covered today, as well as a healthy dose of fruity fun – the perfect recipe to get over your curve-phobia for good.

Freshly Squeezed throw, pattern by Cloth and Crescent
Social Spark (pattern in LP&Q 76)

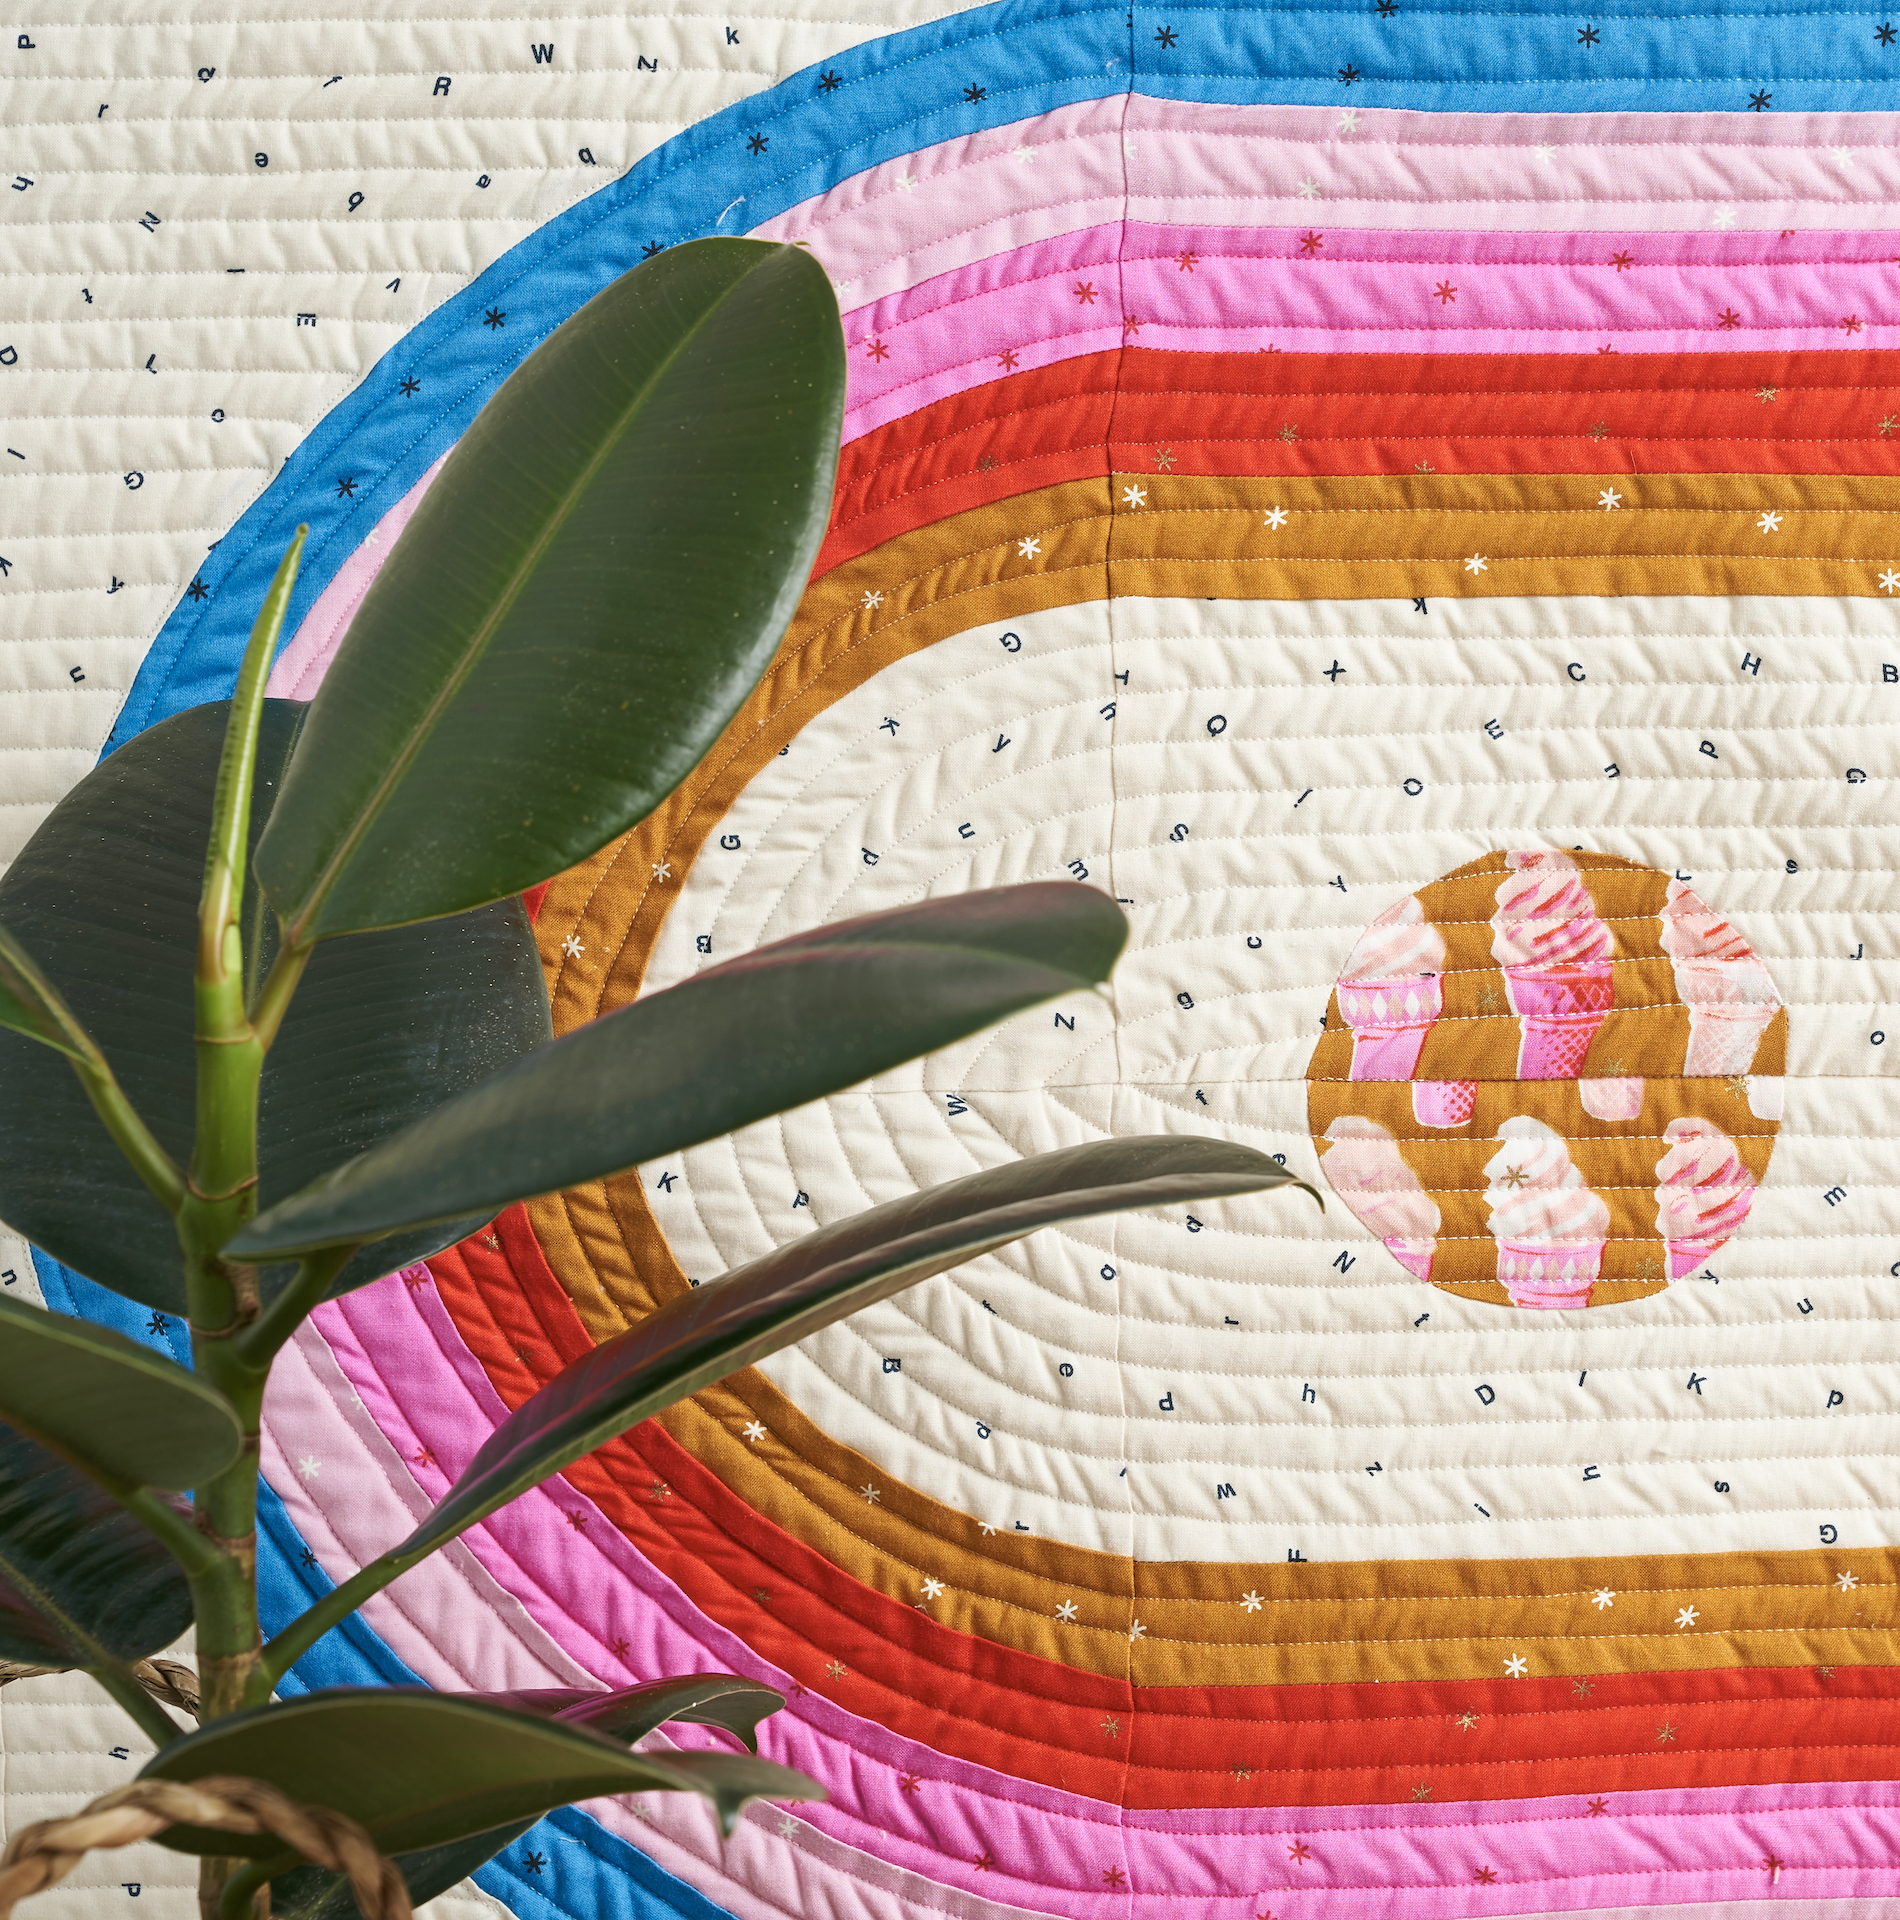
Shape Studies (pattern in LP&Q 72)
That’s that - I officially have no excuse to not bring curves into my quilts! Freshly Squeezed is definitely going to the top of my to make list, and make sure to check out Lorna’s instagram account for more of her awesome curvalicious quilts!