Sewing Machine Basics
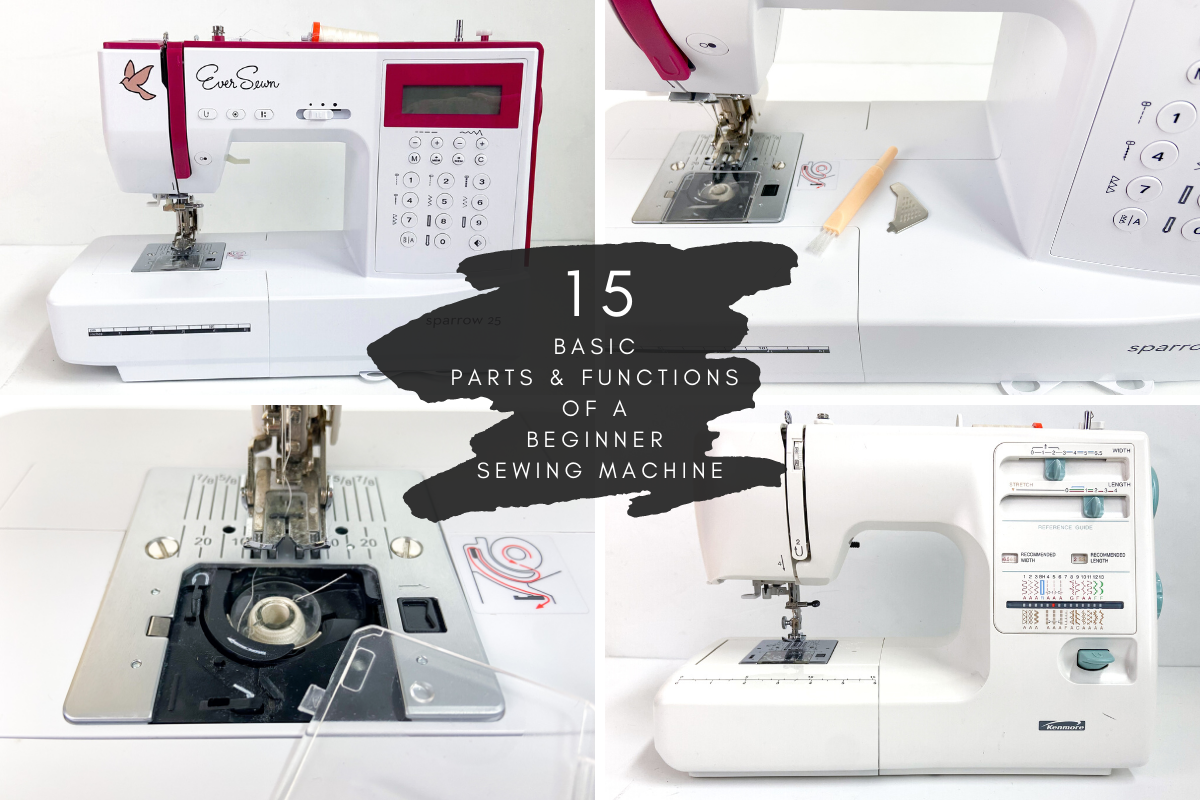
If you’re new to sewing and a sewing machine seems foreign to you (or not new, but just a little confused), we’ve got you covered. In this post you’ll learn about the 15 basic parts and functions of a sewing machine you need to start quilting with confidence!
Each sewing machine is slightly unique, but these basic parts and functions are common across all beginner machines. Both a digital and manual sewing machine are shown in the images that follow. And remember, when in doubt, you can always check your sewing machine manual for additional guidance!
1. Spool Pin: Typically, at the top of your machine, the spool pin holds the main spool of thread (for your top stitch) in place and uses a cap to secure it, so it doesn’t go flying off as it spins when you sew.
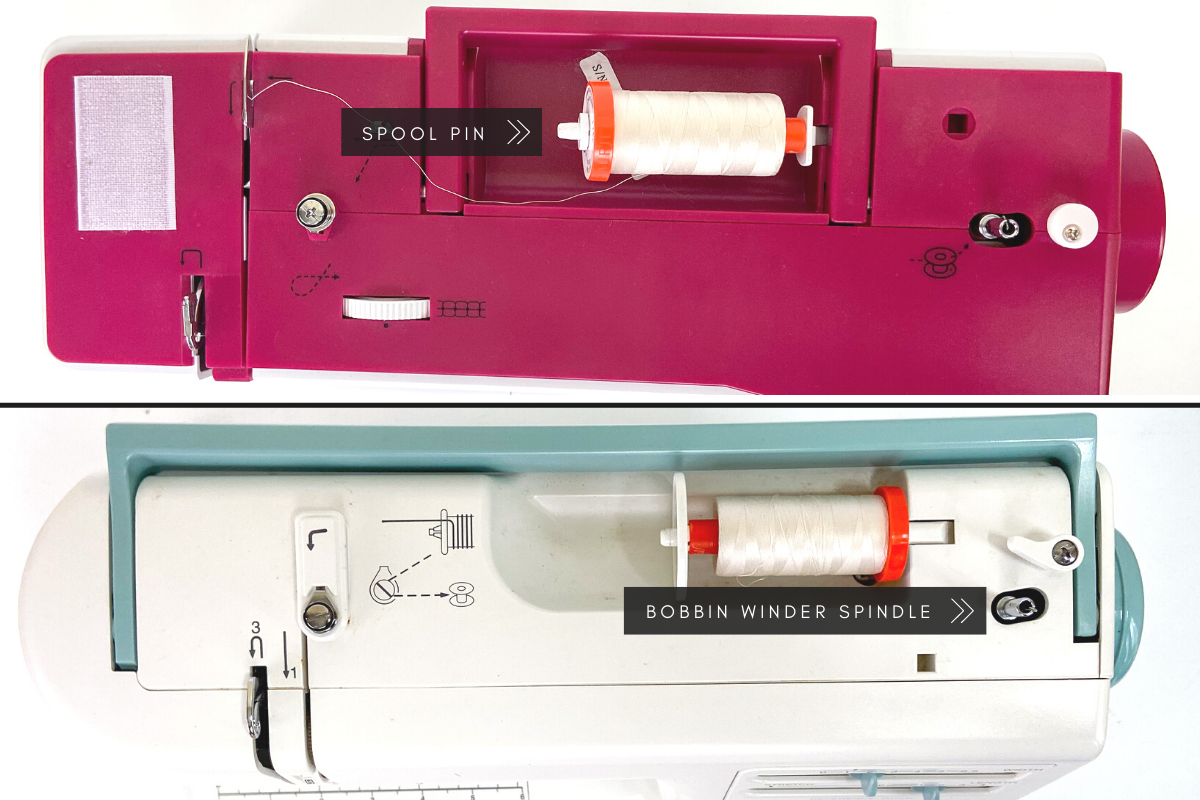
2. Bobbin: The bobbin is a smaller spool of thread (for your bottom stitch) that typically lives somewhere at the base of your machine. It’s covered by a quick release cover for easy removal once it’s empty. The bobbin winder spindle is at the top of machine near the spool pin - this is where you’ll wind new thread onto the bobbin spool when needed.
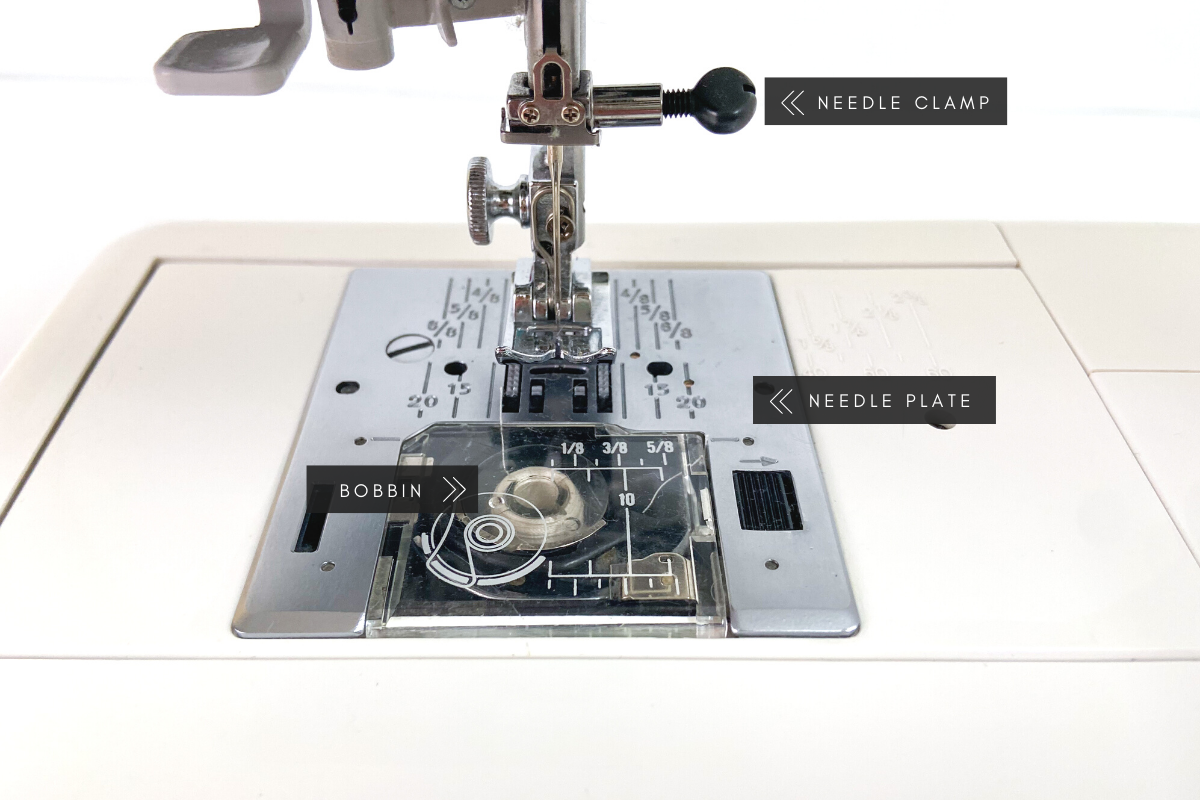
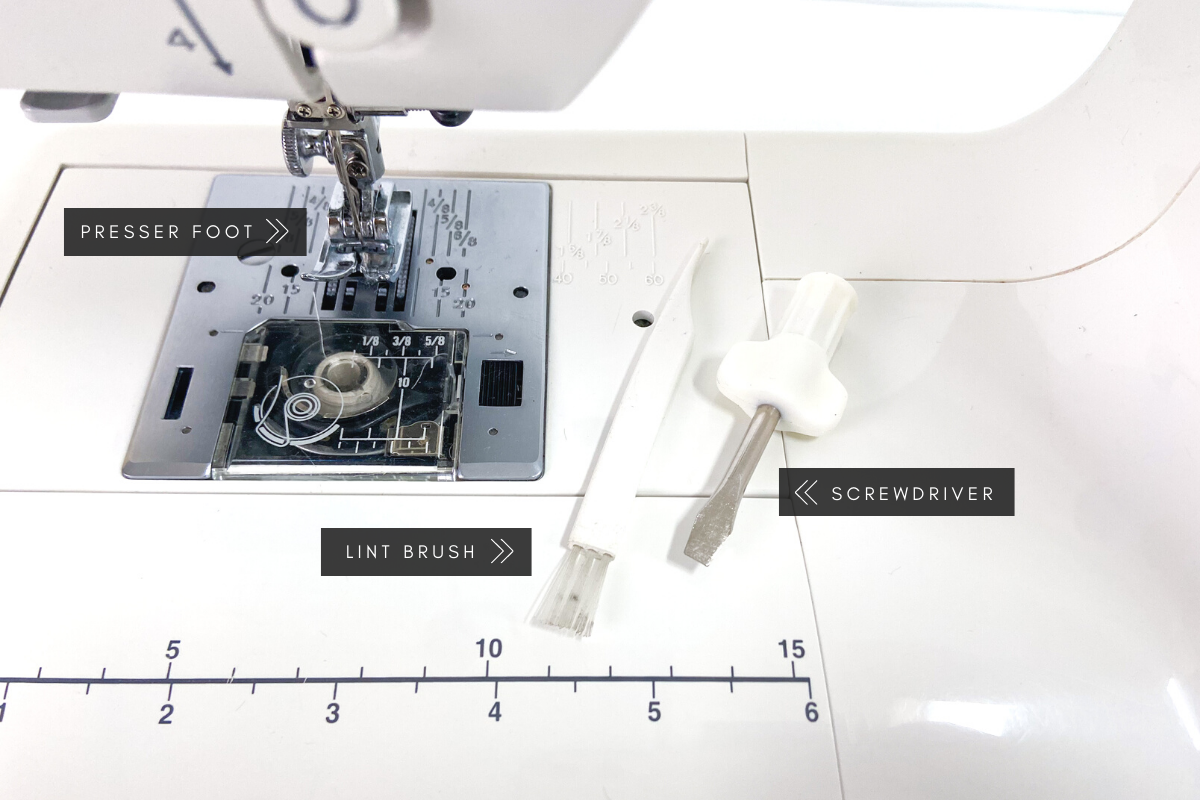
3. Needle Plate: Located at the base of your sewing machine right below the needle, this metal plate prevents fabric from being pushed down into the machine. Some needle plates also have measurements inscribed in them to serve as a guide when stitching. The needle plate can be removed with a small screwdriver (typically one comes with each sewing machine). It’s important to remove the bobbin and needle plate every few sewing projects and use a small lint brush (again, this typically comes with your machine) to clean out any dust or lint build up and keep your machine running smoothly.
4. Feed Dogs: Typically located in the center of the needle plate, these little teeth-like grippers pull the underside of the fabric forward as you sew so it doesn’t get sucked down into your sewing machine.

5. Needle & Needle Clamp: The needle is used to form a stitch in your fabric and the clamp allows you to easily remove and replace the old needle with a new one as needed. See your sewing machine manual for specifics on how to thread your machine.
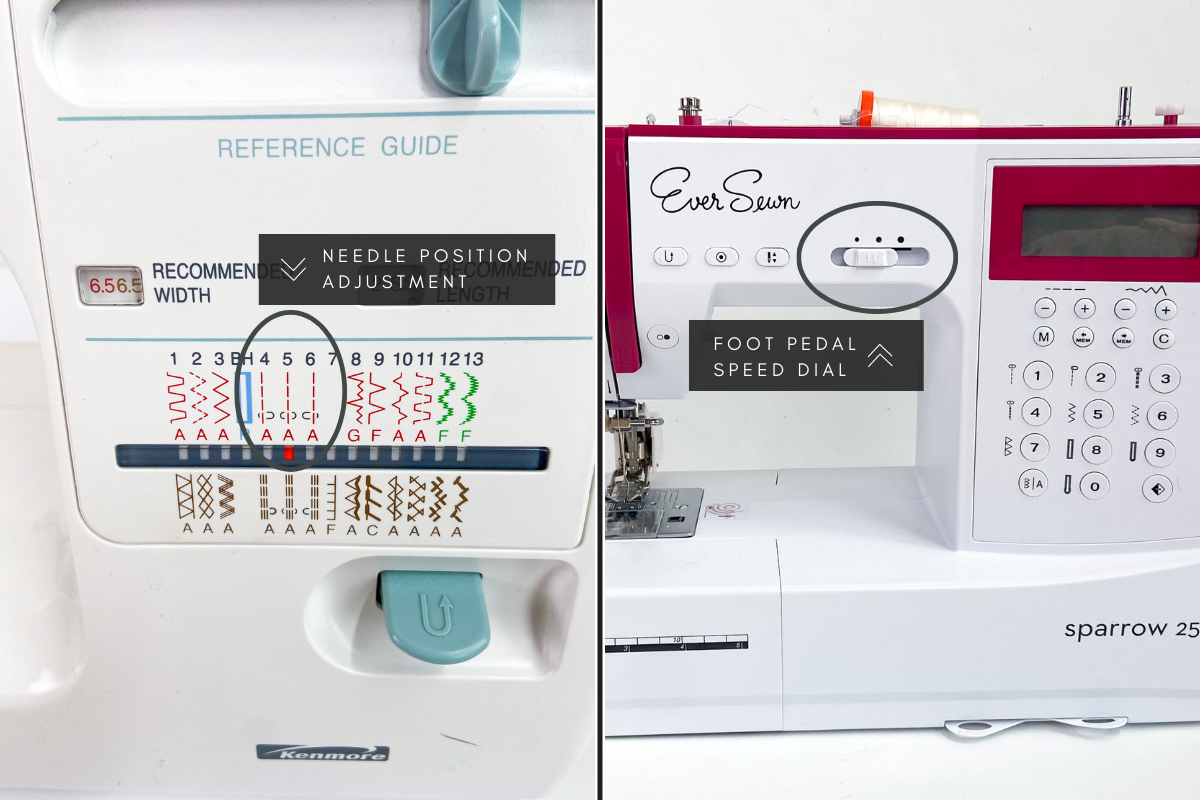
6. Needle Position Adjustment: Machines vary with where this dial or button is located, but it allows you to adjust the needle position to the left or right ever so slightly to help you get that perfect ¼” seam allowance when piecing.
7. Presser Foot: The presser foot holds the fabric in place as you sew. It can be lifted and lowered using a lever on back of your machine. The presser foot can also be changed out with different feet using the screwdriver that came with your machine. A basic presser foot works just fine for piecing, but if you plan to quilt your three-layer quilt sandwich on your home machine, you’ll want to invest in a walking foot (a specialized presser foot that doesn’t typically come with a standard sewing machine). Remember the feed dogs I mentioned above that pull the underside of the fabric forward as you sew? Well, a walking foot has additional feed dogs built into the presser foot so that you have feed dogs working on both sides of your fabric - top and bottom. This helps to pull your quilt sandwich through the machine more evenly.
8. Foot Pedal & Handwheel: Unless you’re working on an antique machine, your sewing machine should have a foot pedal. The foot pedal powers your machine - moving the needle up and down as you sew. Some machines even have a dial that sets the speed (this can be helpful for quilters as you may sew faster when piecing, but more slowly when quilting and you don’t want to accidentally hit the gas too hard). Every machine also has a handwheel located on the side that allows you to raise or lower the needle manually for when you need more precise control.

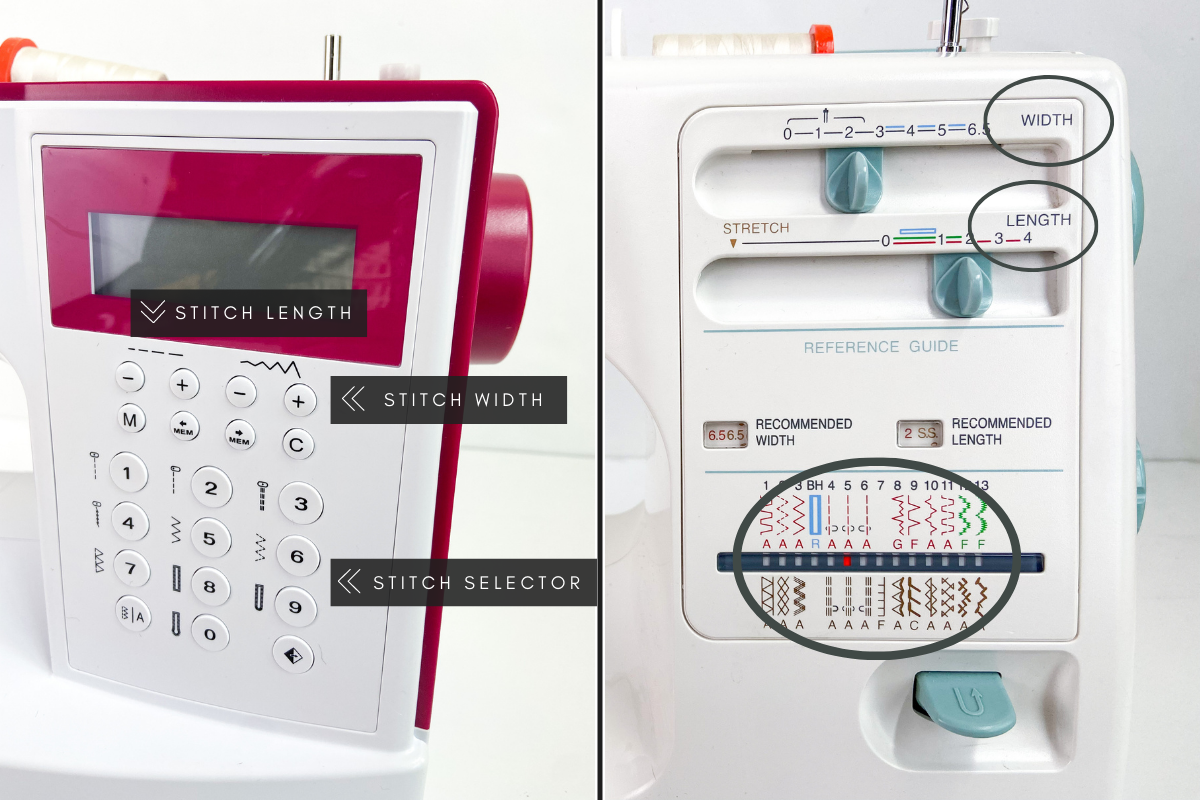
9. Stitch Length Dial: This dial controls the length of each stitch. Quilters typically use about a 2mm stitch length for piecing and increase it to 2.5 or 3.0 for machine quilting.
10. Stitch Selector: This function allows you to choose the stitch type to use. The most common stitch is the straight stitch, but you may also use the zig-zag stitch in your beginner sewing projects (like when making frankenbatting!).
11. Stitch Width Dial: This dial controls the width of your zig-zag stitches.
12. Reverse Stitch Lever: A sewing machine will sew in reverse when this lever (or button if using a digital machine) is engaged. Reverse stitching is used in quilting when you start and stop a line of stitching to lock the stitches in place and prevent them from coming undone at the ends of your project.

13. Thread Cutter: Basic sewing machines are equipped with a tiny blade on the side of the machine that you can run your threads through to cut your project free from your machine. Some more advanced machines have automatic thread cutters.

14. Throat Space: This is the open space between your needle (to the left) and the main part of your sewing machine (to the right - where all the dials and buttons are located). The size of a sewing machine’s throat dictates how big of a project you can conquer on your home machine. For example, it can be challenging to stuff a large portion of a king size quilt through the small throat of a beginner sewing machine, so pick your quilt size and techniques wisely!

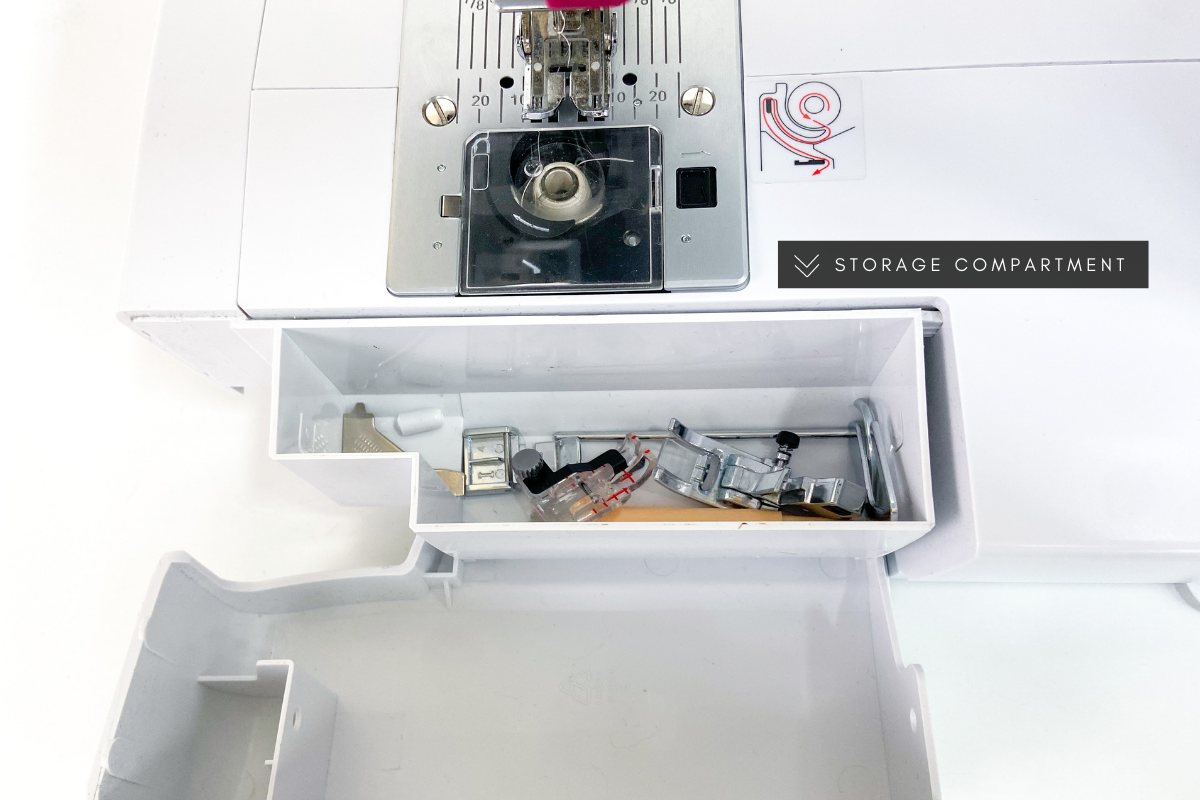
15. Storage Compartment: Most sewing machines have a small storage compartment or accessory box in the front to store tools, presser feet and extra bobbins and needles.