
Coda Quilted Coat: Adapting Quilt Patterns
I took a long time to jump on the quilted coat bandwagon, but once I collaborated with Love Notions on the Coda Quilted Coat pattern I wondered why it took me so long! I chose to lengthen my own coat a bit and add a new pattern to the back (join the Coda Quilted Coat Sew a Long if you want to snag this pattern).
One of my favorite things about the Coda Quilted Coat pattern is that you can swap out almost any block for the back panel, as long as it fits! This is an especially good use for any of the Modern Makes Membership projects. There are just a few simple considerations to keep in mind!
Sizing
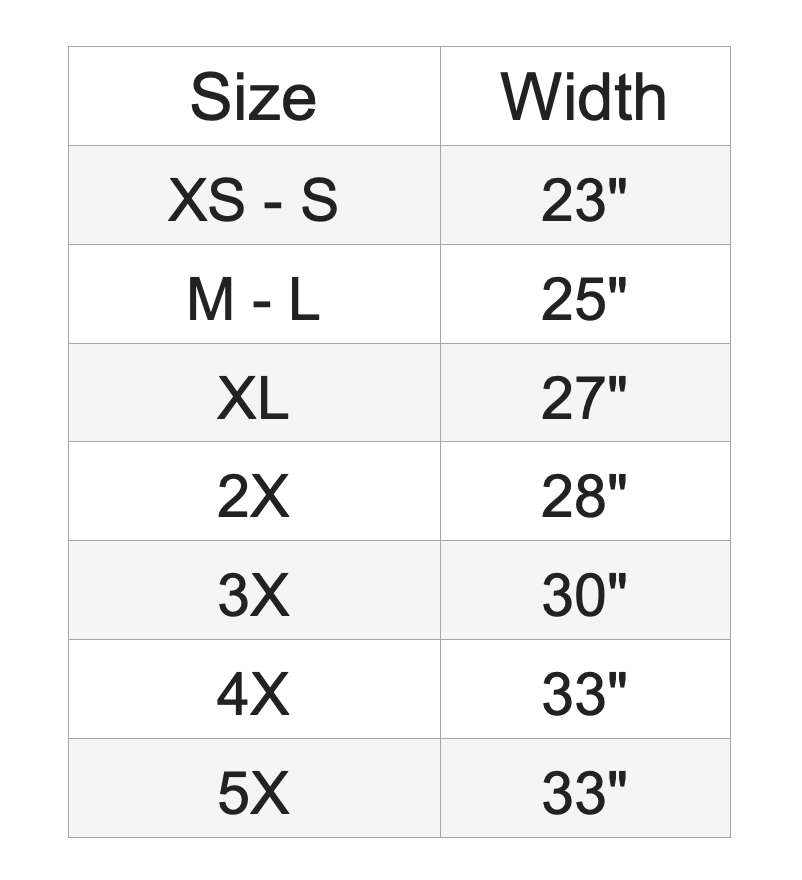
The size of quilt block you’ll need is, of course, dependent on the size of quilt coat you’re making and the length you choose. For the Coda Quilted Coat specifically, the pattern requires a 26” length panel as written (without any lengthening or shortening). The width of the panel needed for each size is shown in the table below:
There’s a section in the pattern that explains how to shorten or lengthen your coat pattern pieces if you’d like. Once you’ve decided on the length of your coat, you can decide how you need to modify your quilt pattern to fit! Keep in mind you can also do this in the opposite way: Pick a quilt block pattern you like and adjust the length of the coat to fit it.
With the back pattern piece cut out and ready to go, carefully measure the length from the top shoulder to the bottom to determine the required length for your block. Keep in mind that there will be part of the quilt block cut out for the neck curve, so plan your design appropriately! I accounted for this by adding an extra rectangle of fabric at the top, pushing my design down a bit. Here’s an example of my quilt block with the pattern piece laid over the top:
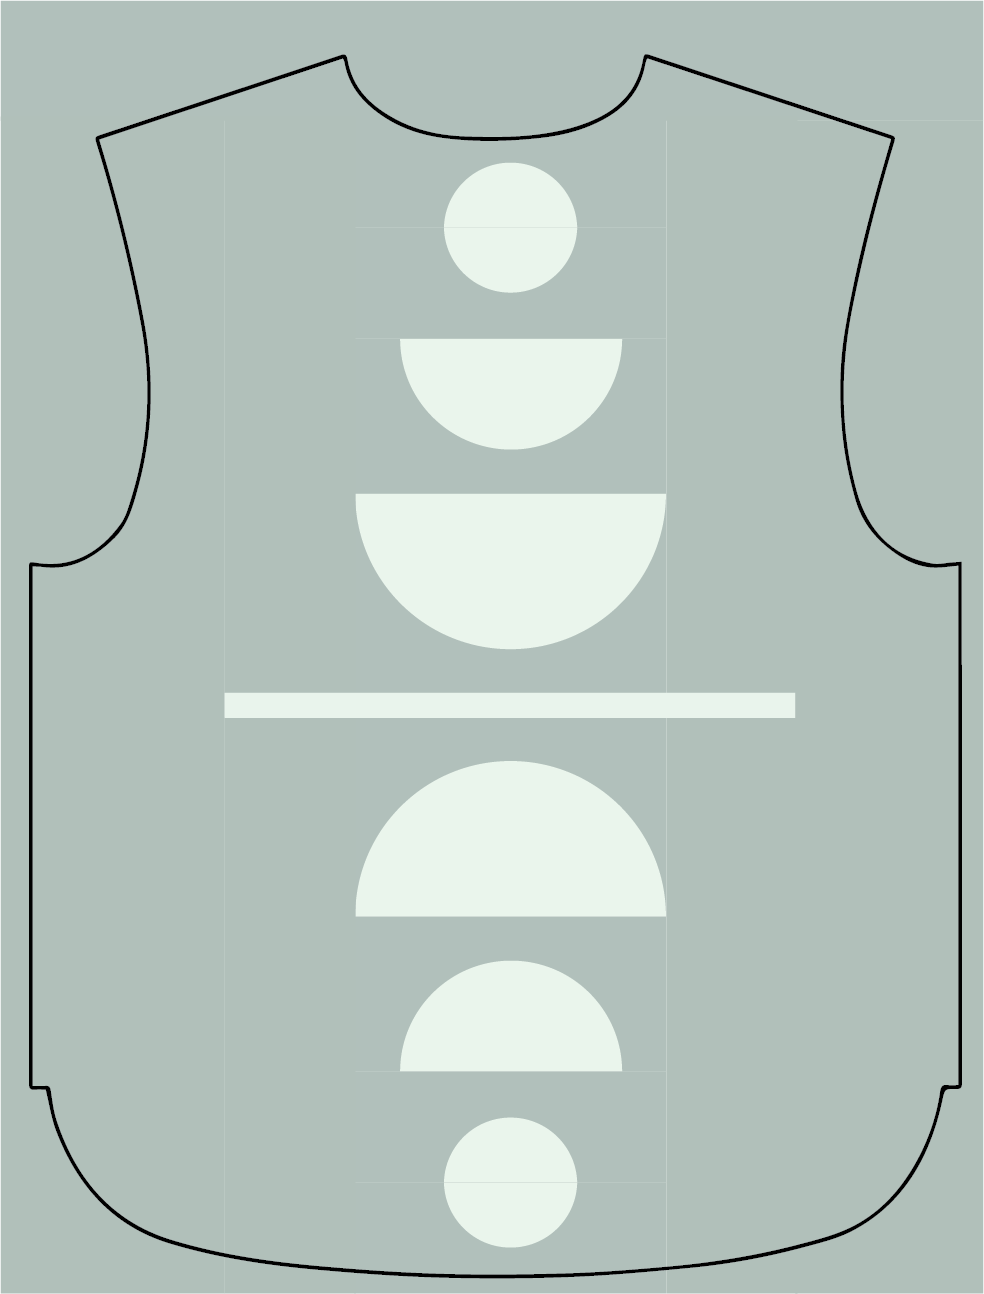
I also found that my quilt block design was a tiny bit longer than the quilt coat back panel was, so I curved the bottom of my back piece a little bit to ensure that the full design was on the piece. Here’s the pattern piece overlaid on the quilt block. You can see that the bottom of the block is peeking out from under the pattern piece:

First I cut out the entire back pattern except for the bottom. Then, I carefully curved down past the pattern as I cut the pack piece out. I cut only to the halfway mark on the back, making sure to cut a smooth curve and include all of the quilt block that I wanted on my coat back.

Once I reached the center of the back, I removed the pattern piece and folded the quilt block in half. Then, I used the cut edge as a guide to cut the curve of the other half of the back panel, so it was appropriately mirrored.
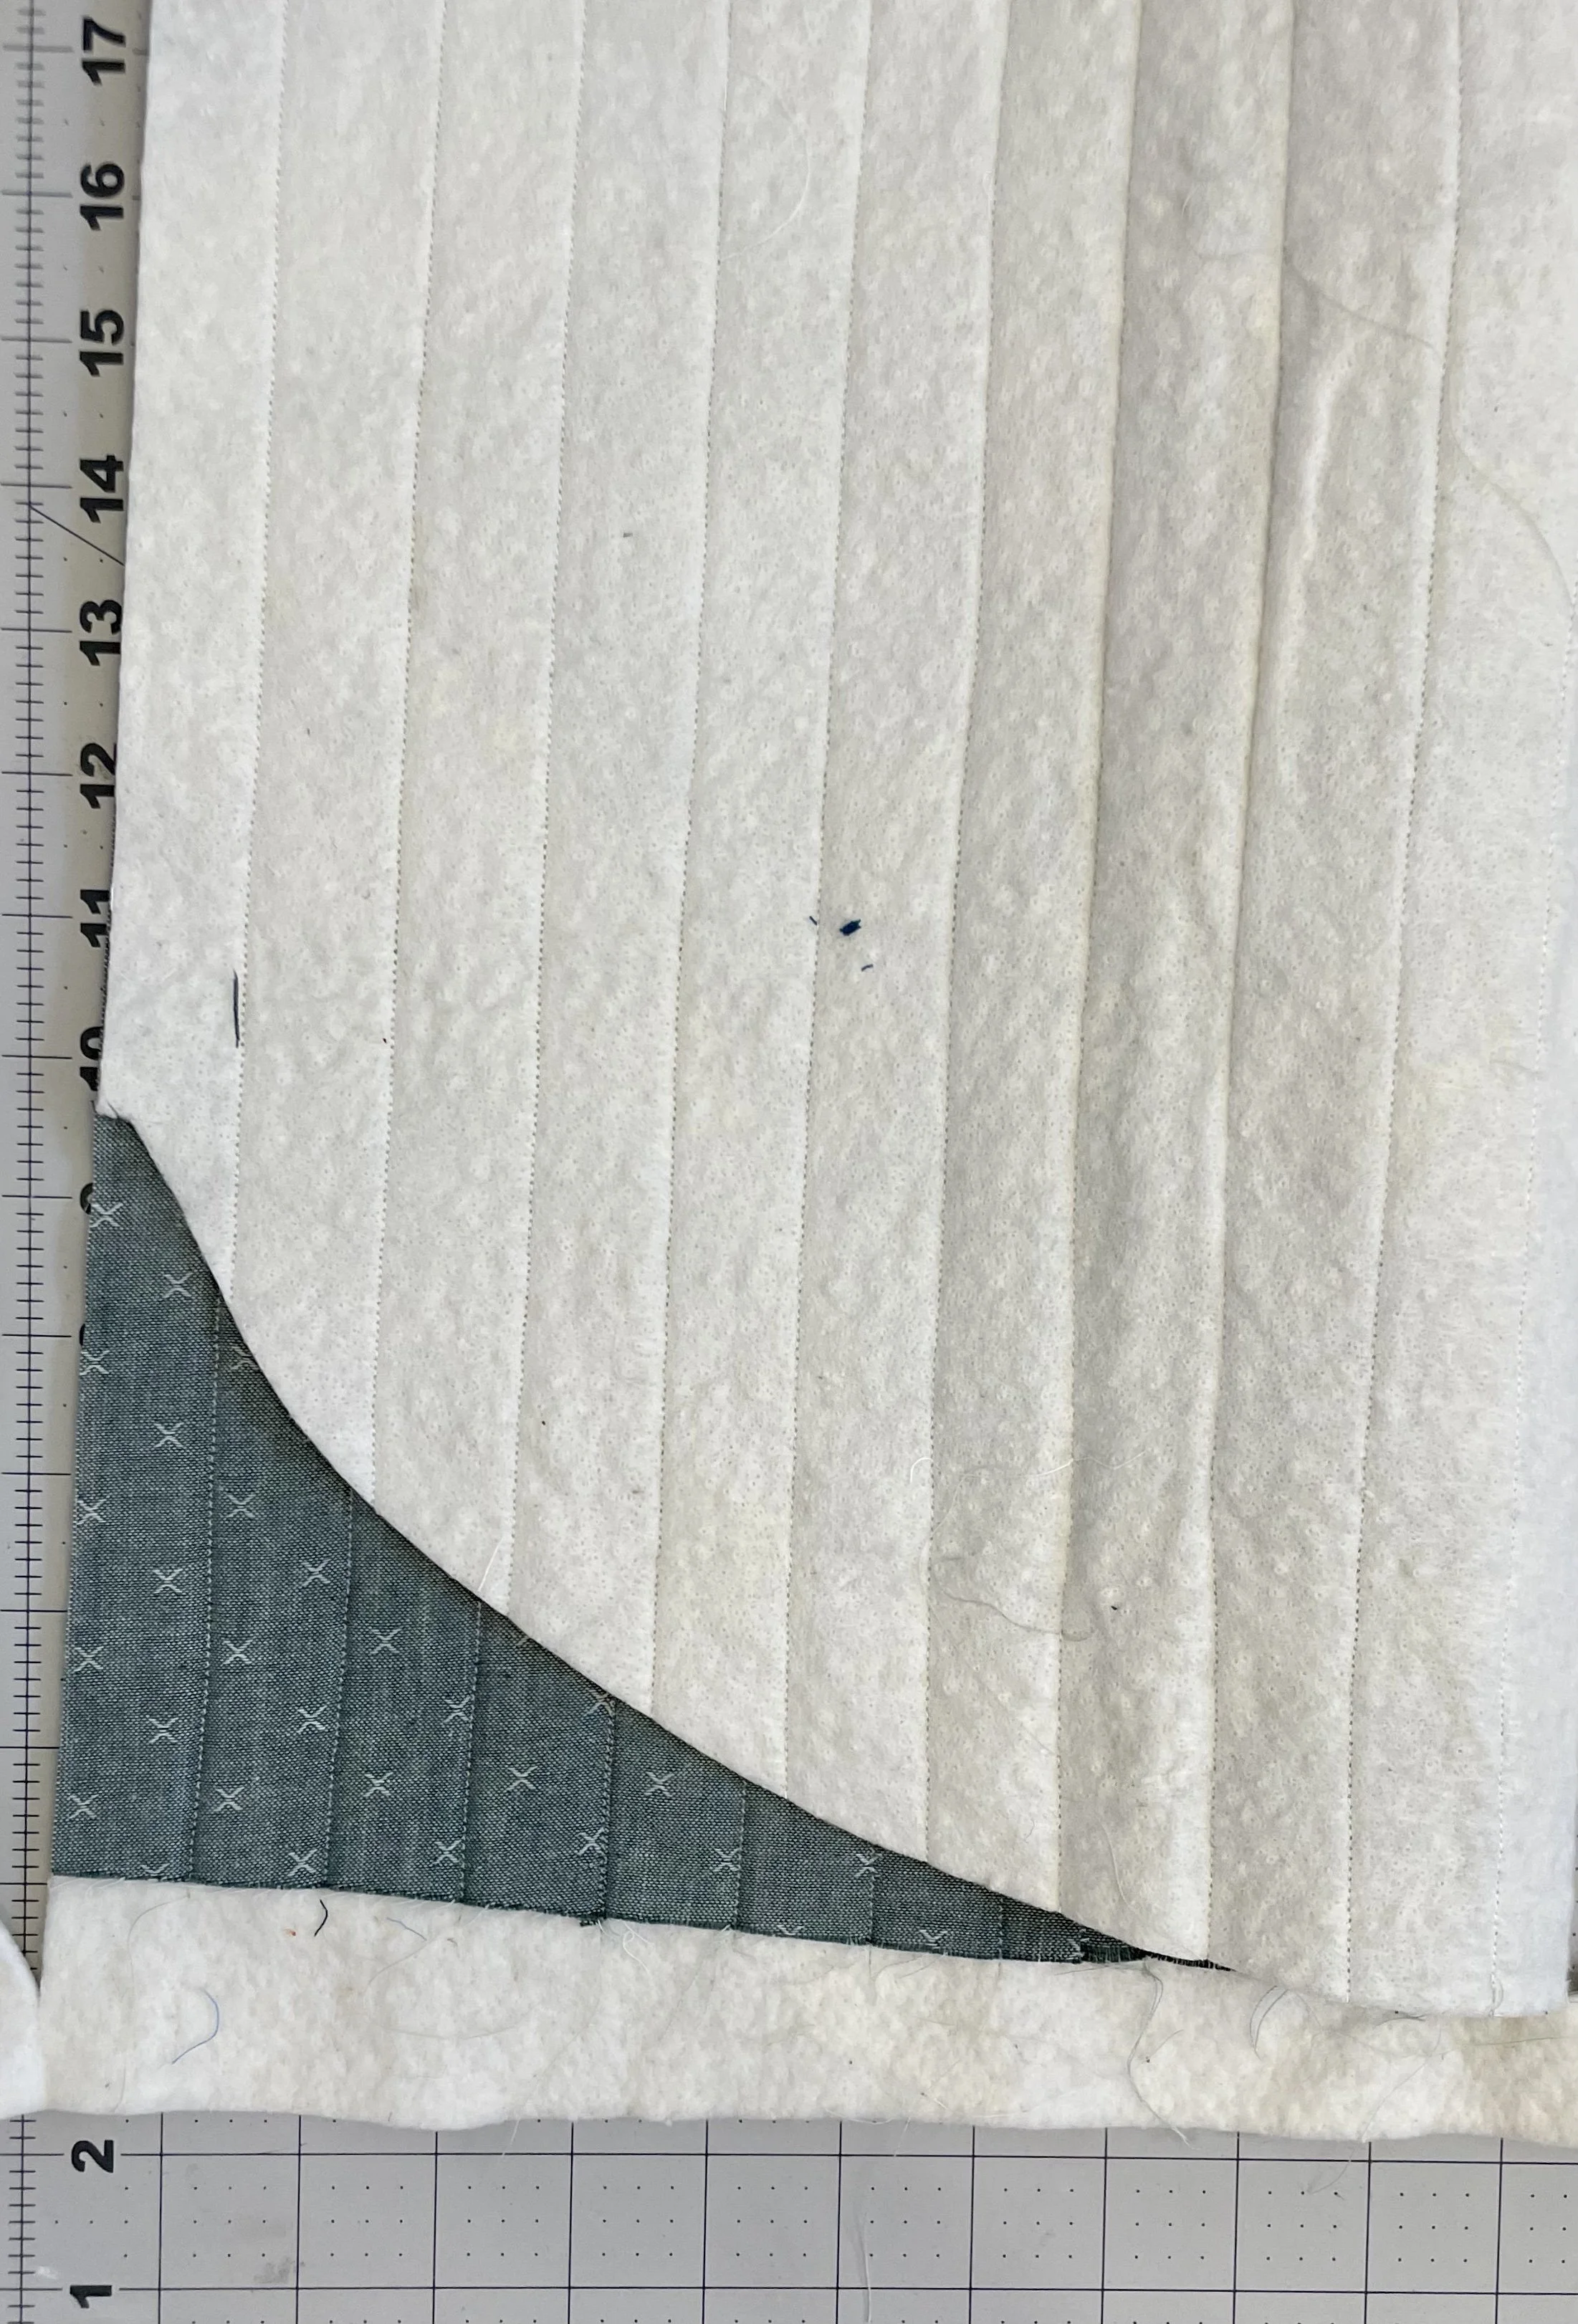
Now my coat has a slight dip in the back, which I quite like!


There are so many fun designs that could be used on the back panels of the Coda Quilted Coat! Here are a few examples of patterns from the Modern Makes Membership that I think would be especially fun to see.

From left to right: Dawn to Dusk, Woodrose, and Full Moon. All patterns are can be found at modern-makes.com.