
Moonlit Coven Pillow Tutorial
If you’re in the mood for a quick, satisfying project that looks way more complicated than it actually is, this one’s for you! The Moonlit Coven pillow uses a simple reverse appliqué technique to create those cute little witch hats; and yes, it’s as fun as it sounds.
Materials
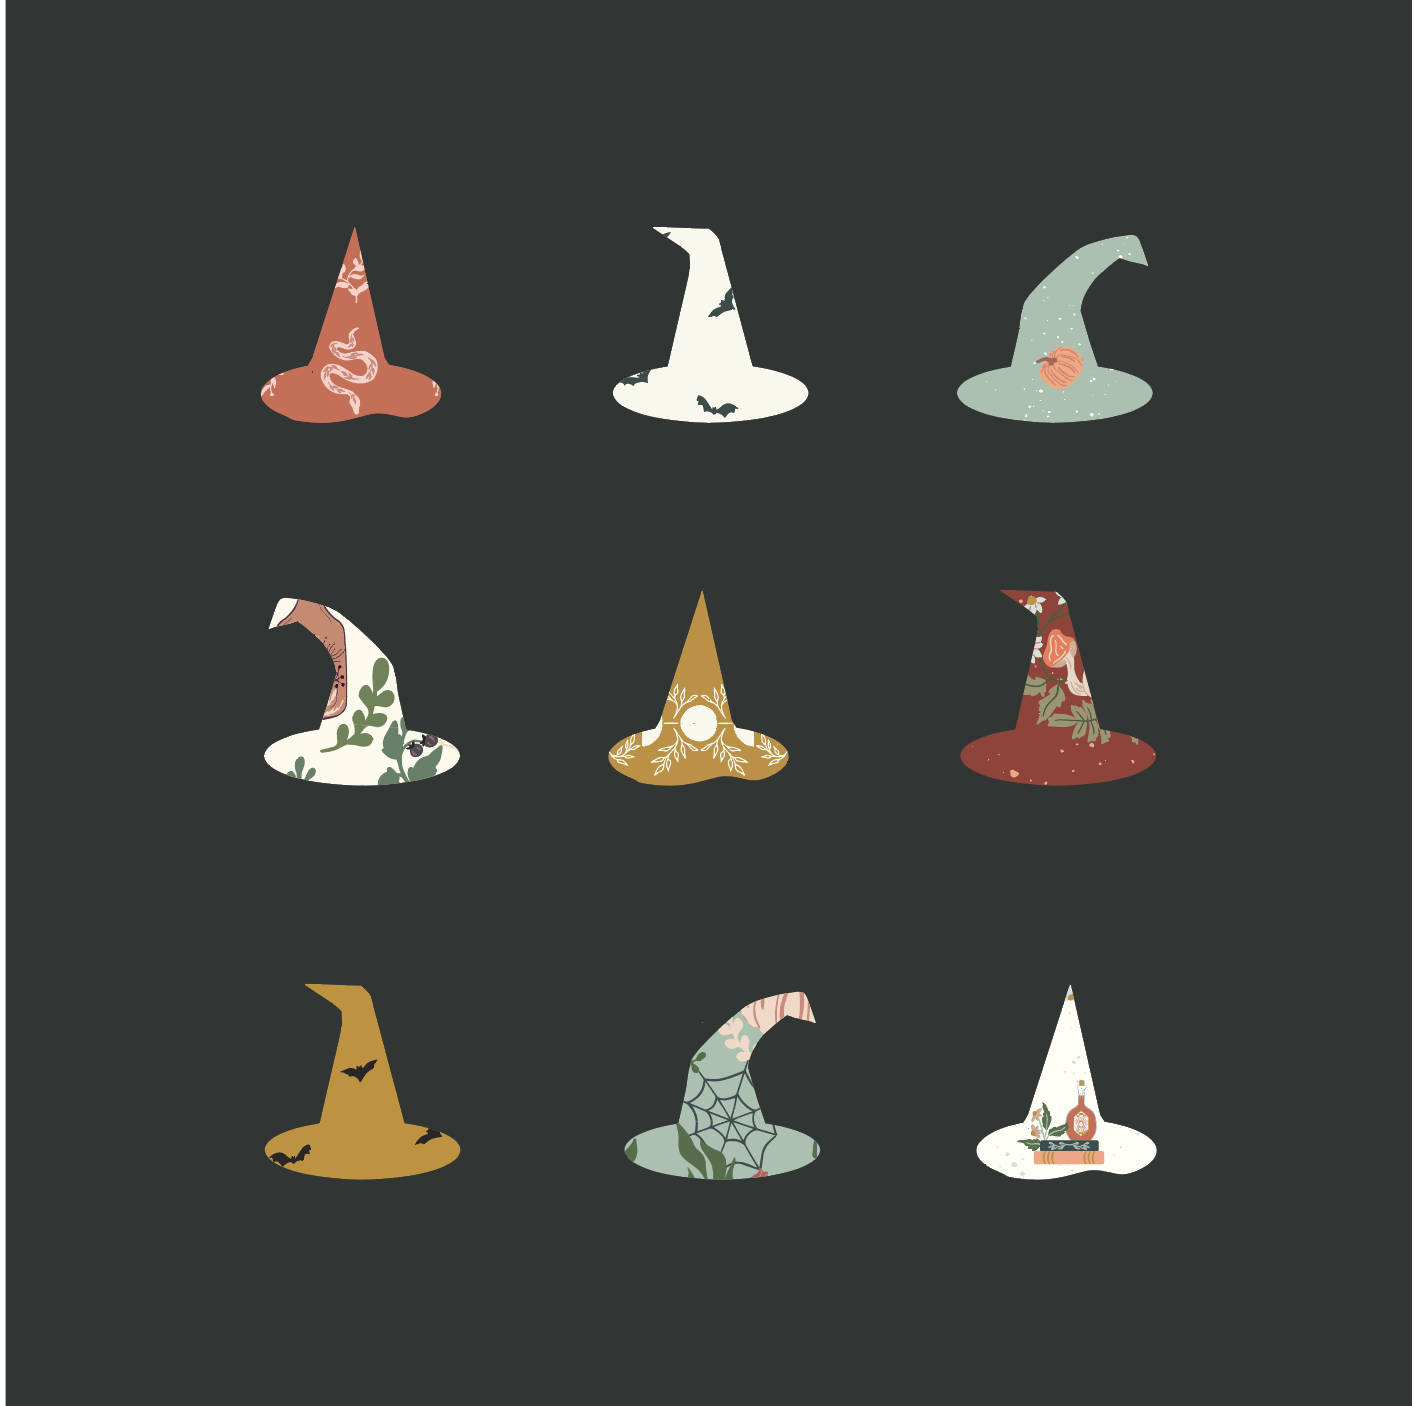
(6) 3 ½" x 3 ½" squares for witch hats
(1) 18 ½" square for pillow front
Batting + backing (for quilting)
Template (witch hat shape)
Tailor’s chalk or water-soluble pen
Step 1: Prep Your Templates
This one is easy - out your witch hat templates!
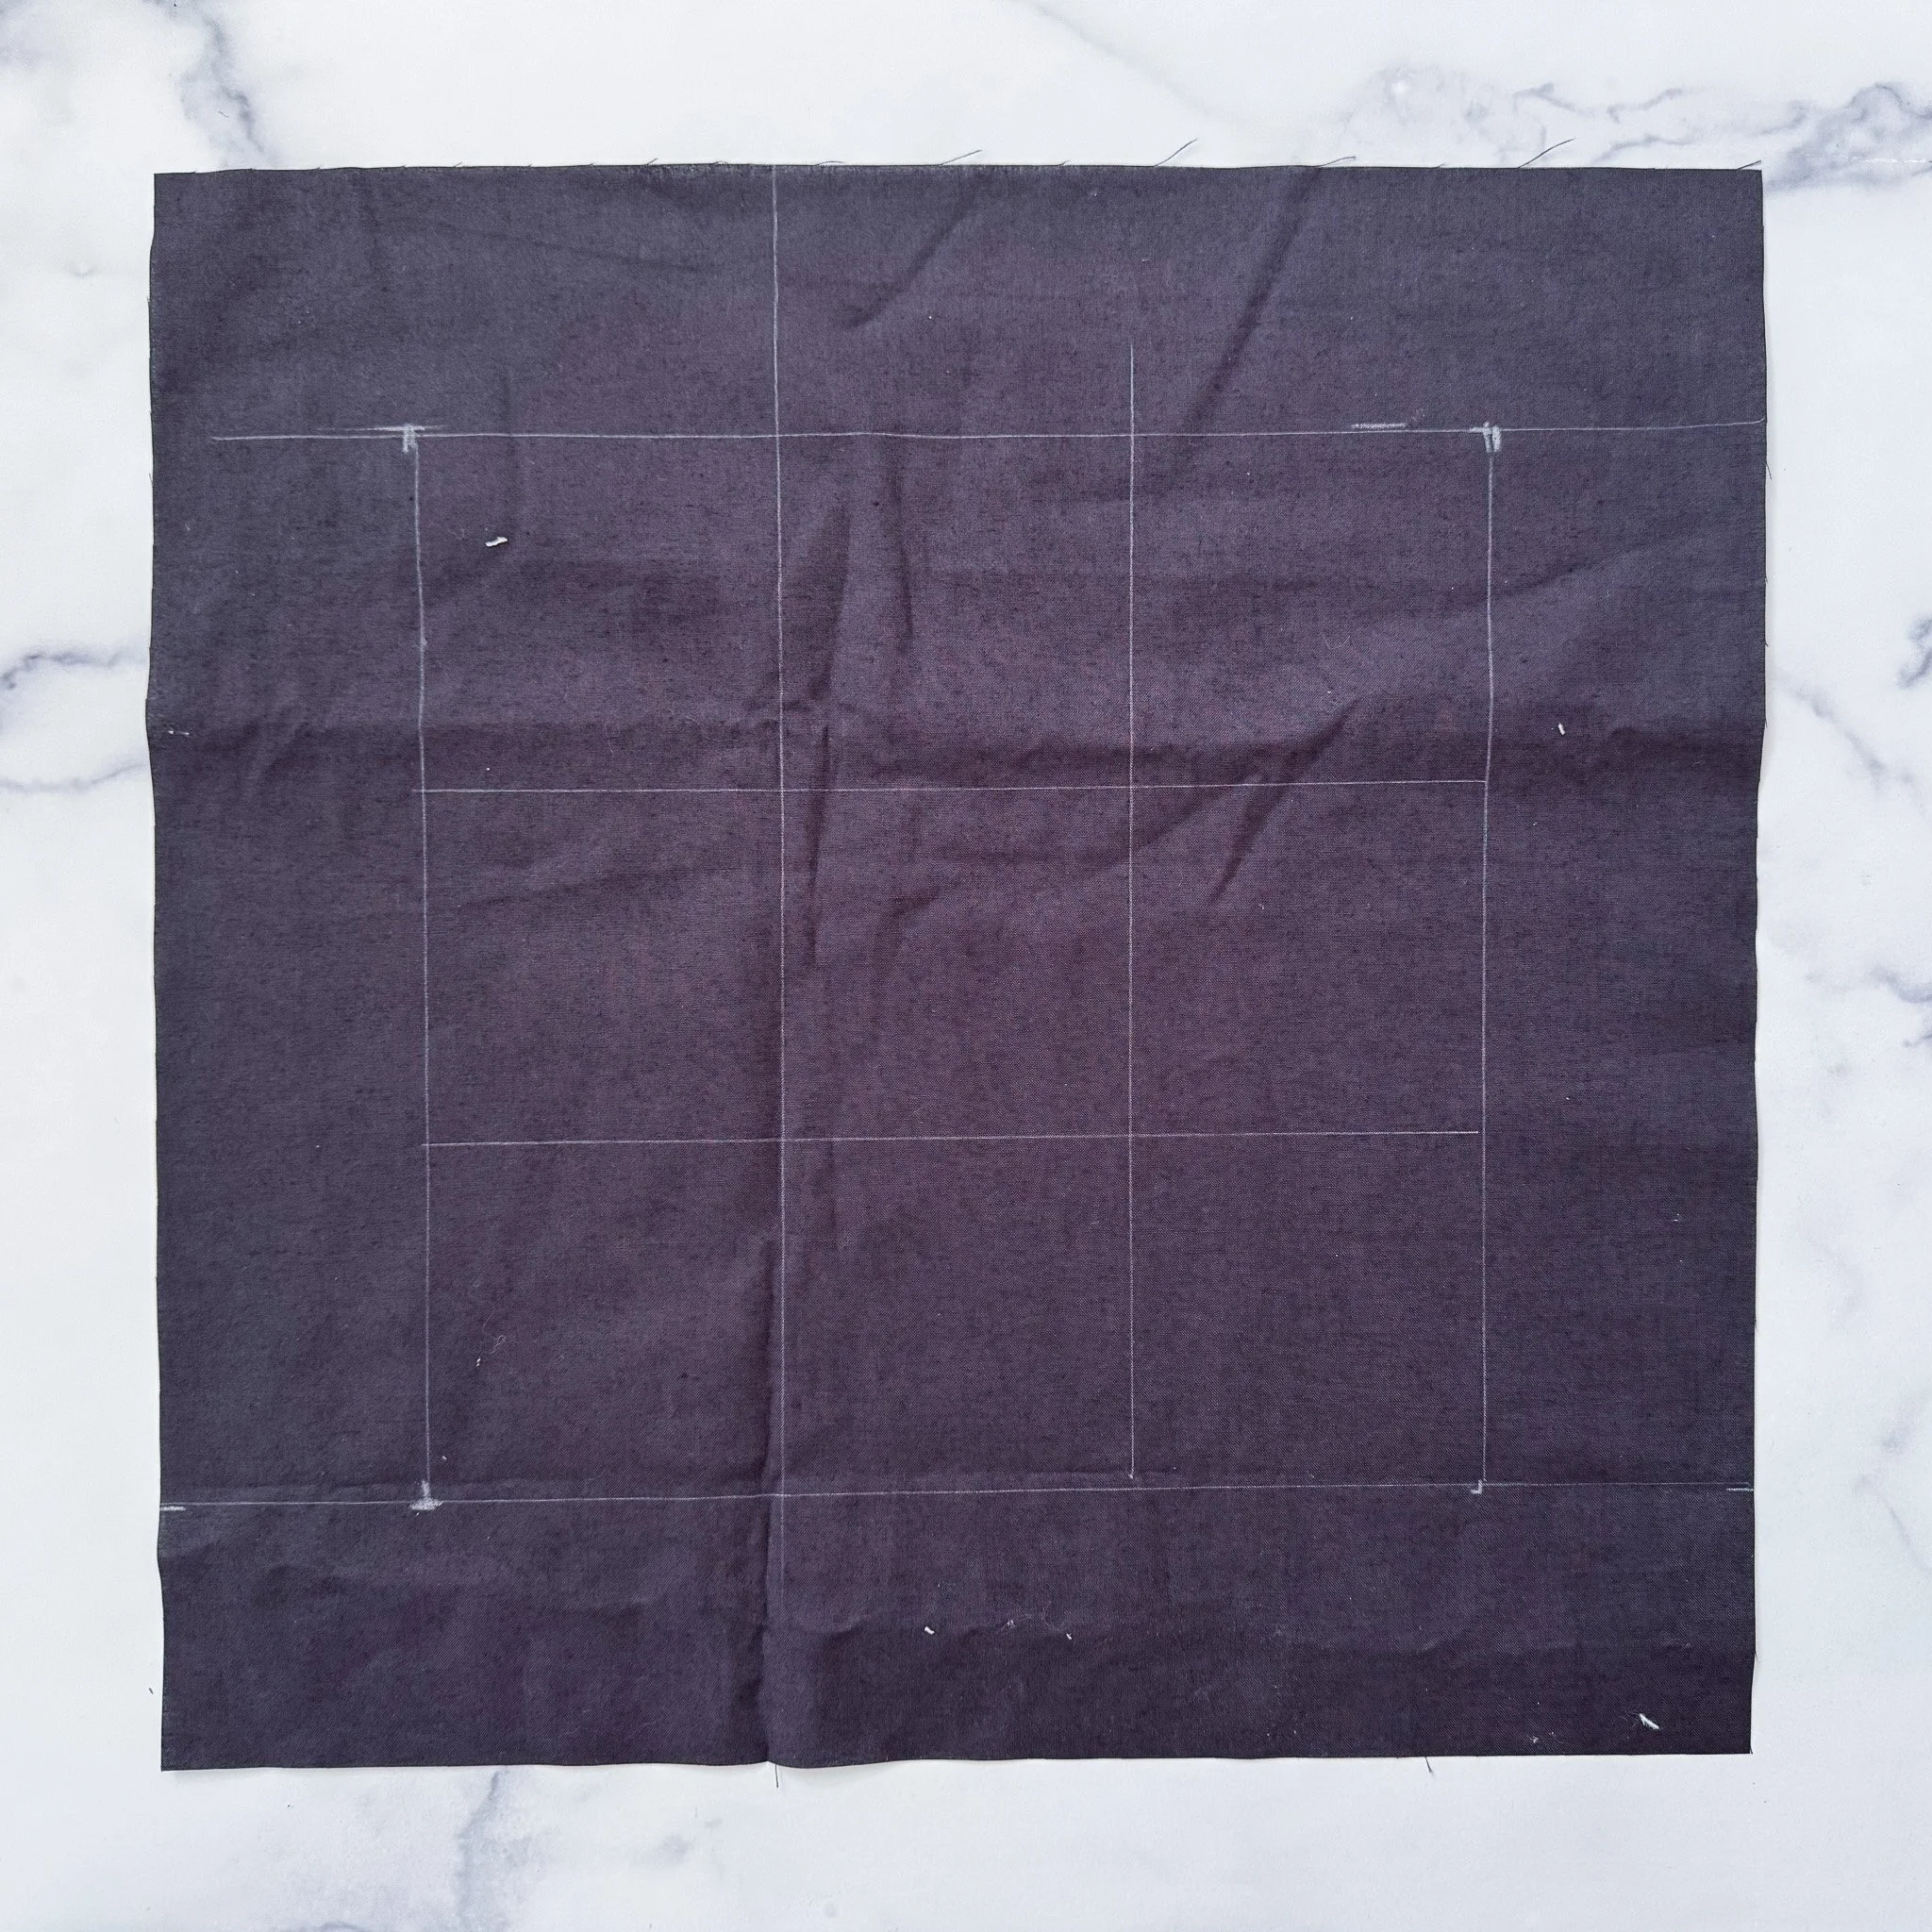
Step 2: Mark Your Grid
Lightly draw a grid on your pillow square using chalk or a fabric-safe pen. This helps evenly space your hats.
For mine, I first drew a line about 2.25” away from the edge all around the pillow to act as a border. Then, I divded the interior of this line into a 3 × 3 grid, with each square measuring roughly 4.5” x 4.5” .
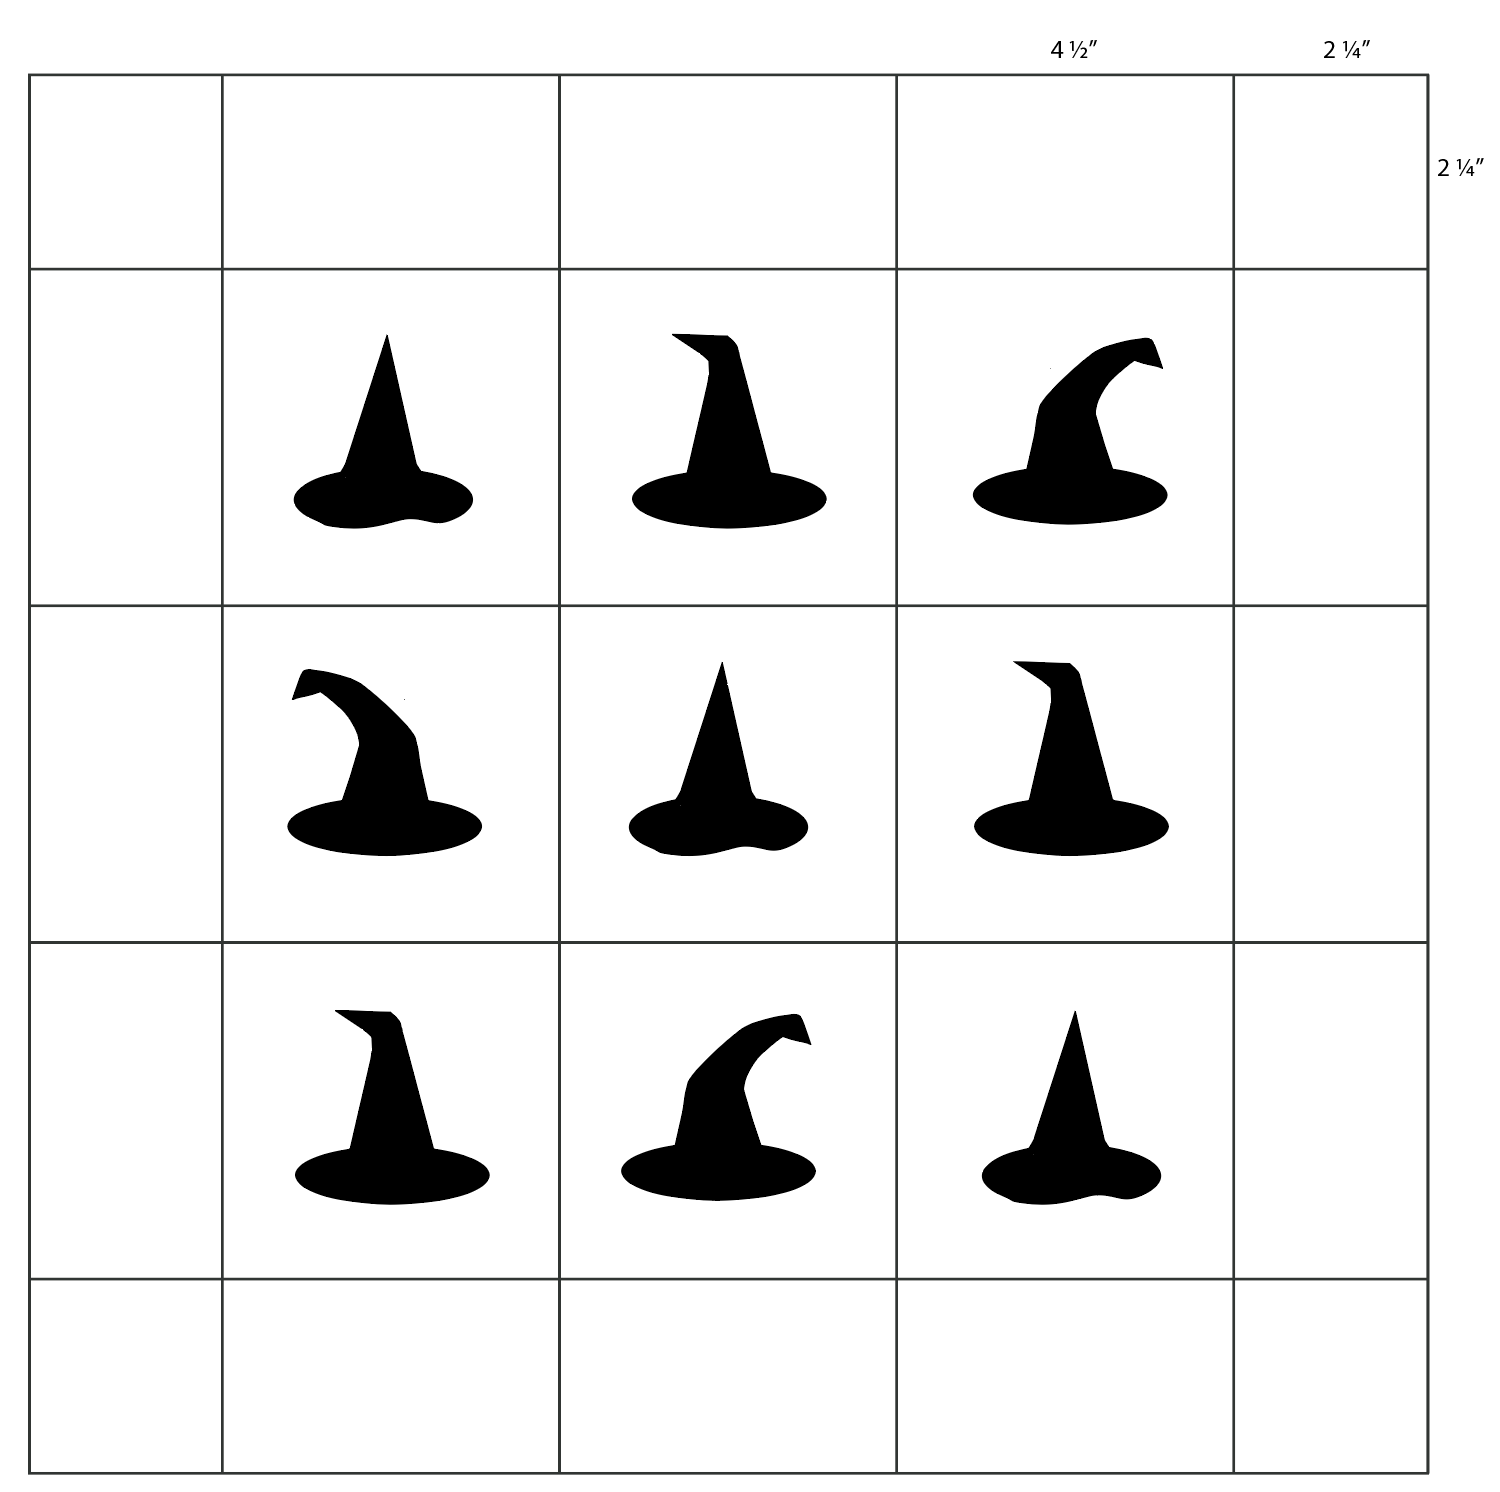
Step 3: Plan Your Layout
Place a template in each grid square and play around with layout until you’re happy. Then trace around each template. Flip templates to the wrong side to change their orientation for more variety.
Step 4: Add the Fabric (Reverse Appliqué Setup)
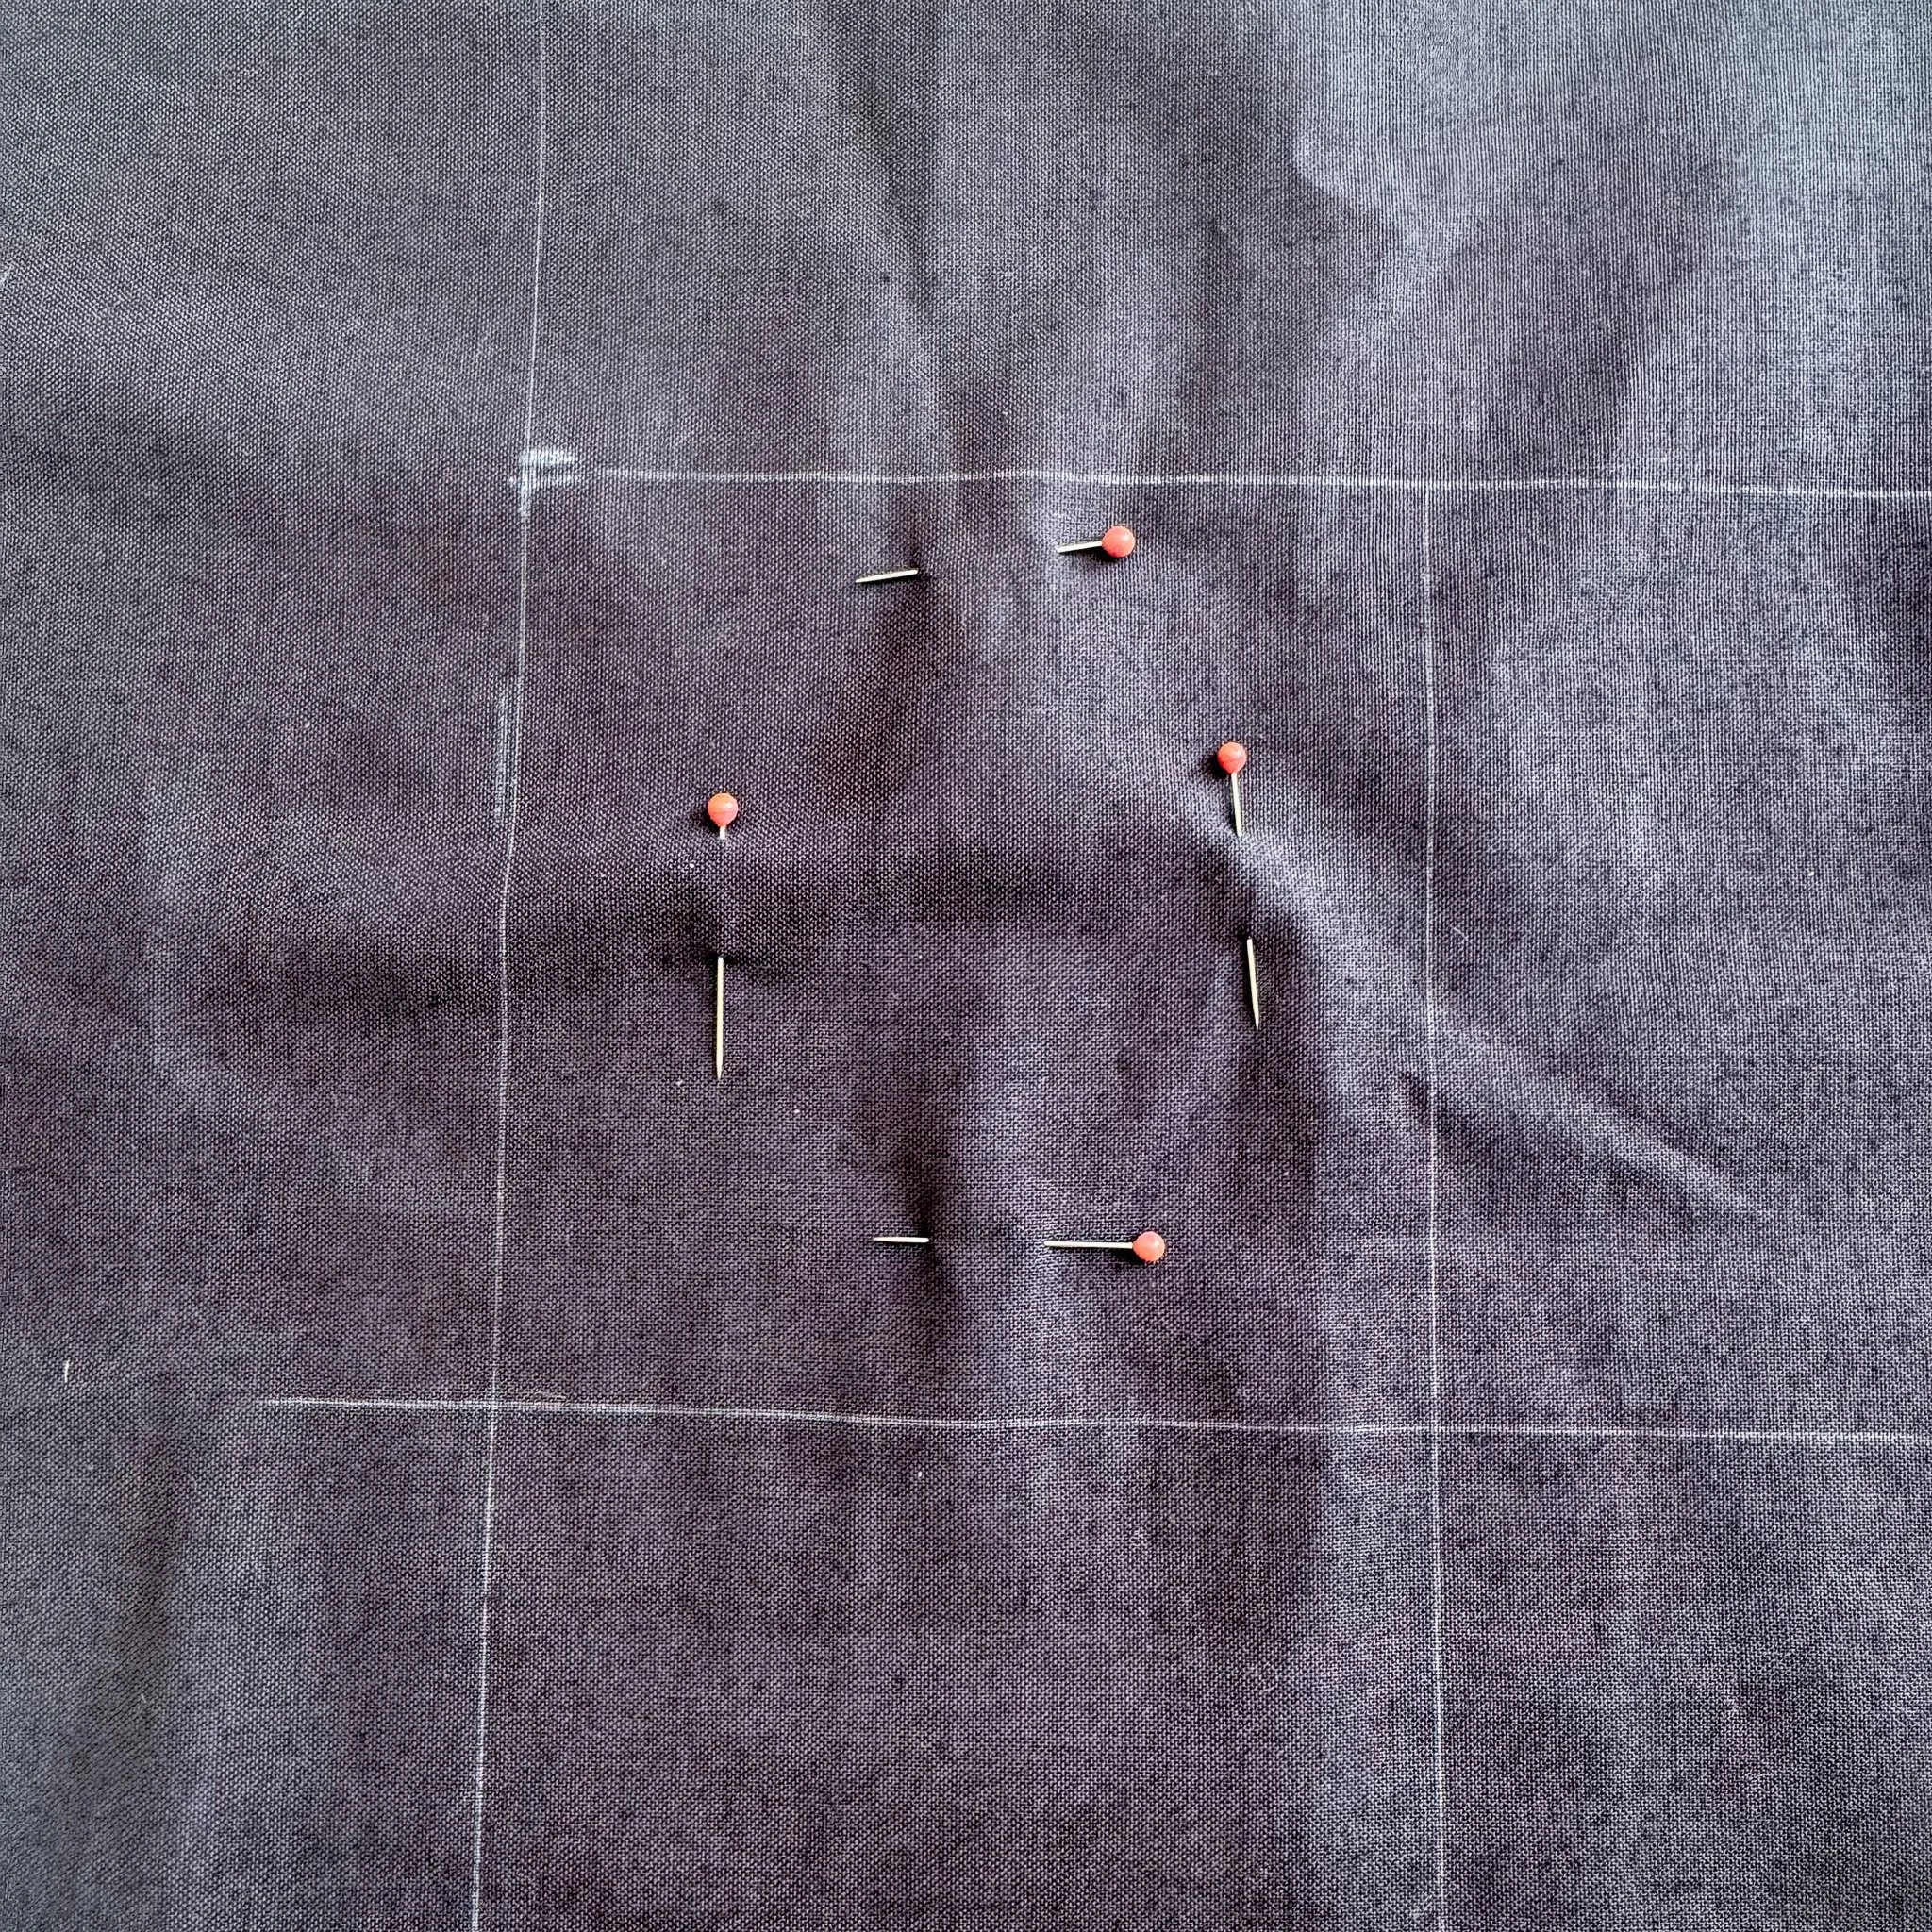
Flip your pillow front over. Center a hat fabric square behind one of the traced shapes, right side facing the wrong side of the pillow.
Pin it in place carefully! (Note that in the photo below, I pinned the fabric before tracing the hat template - I quickly realized this was not the right order of things!
Step 5: Stitch the Shape
Carefully sew along the traced hat line from the front. Go slow, especially around corners, and make sure your fabric underneath isn’t shifting. It’s ok if this step isn’t perfect; just do your best!
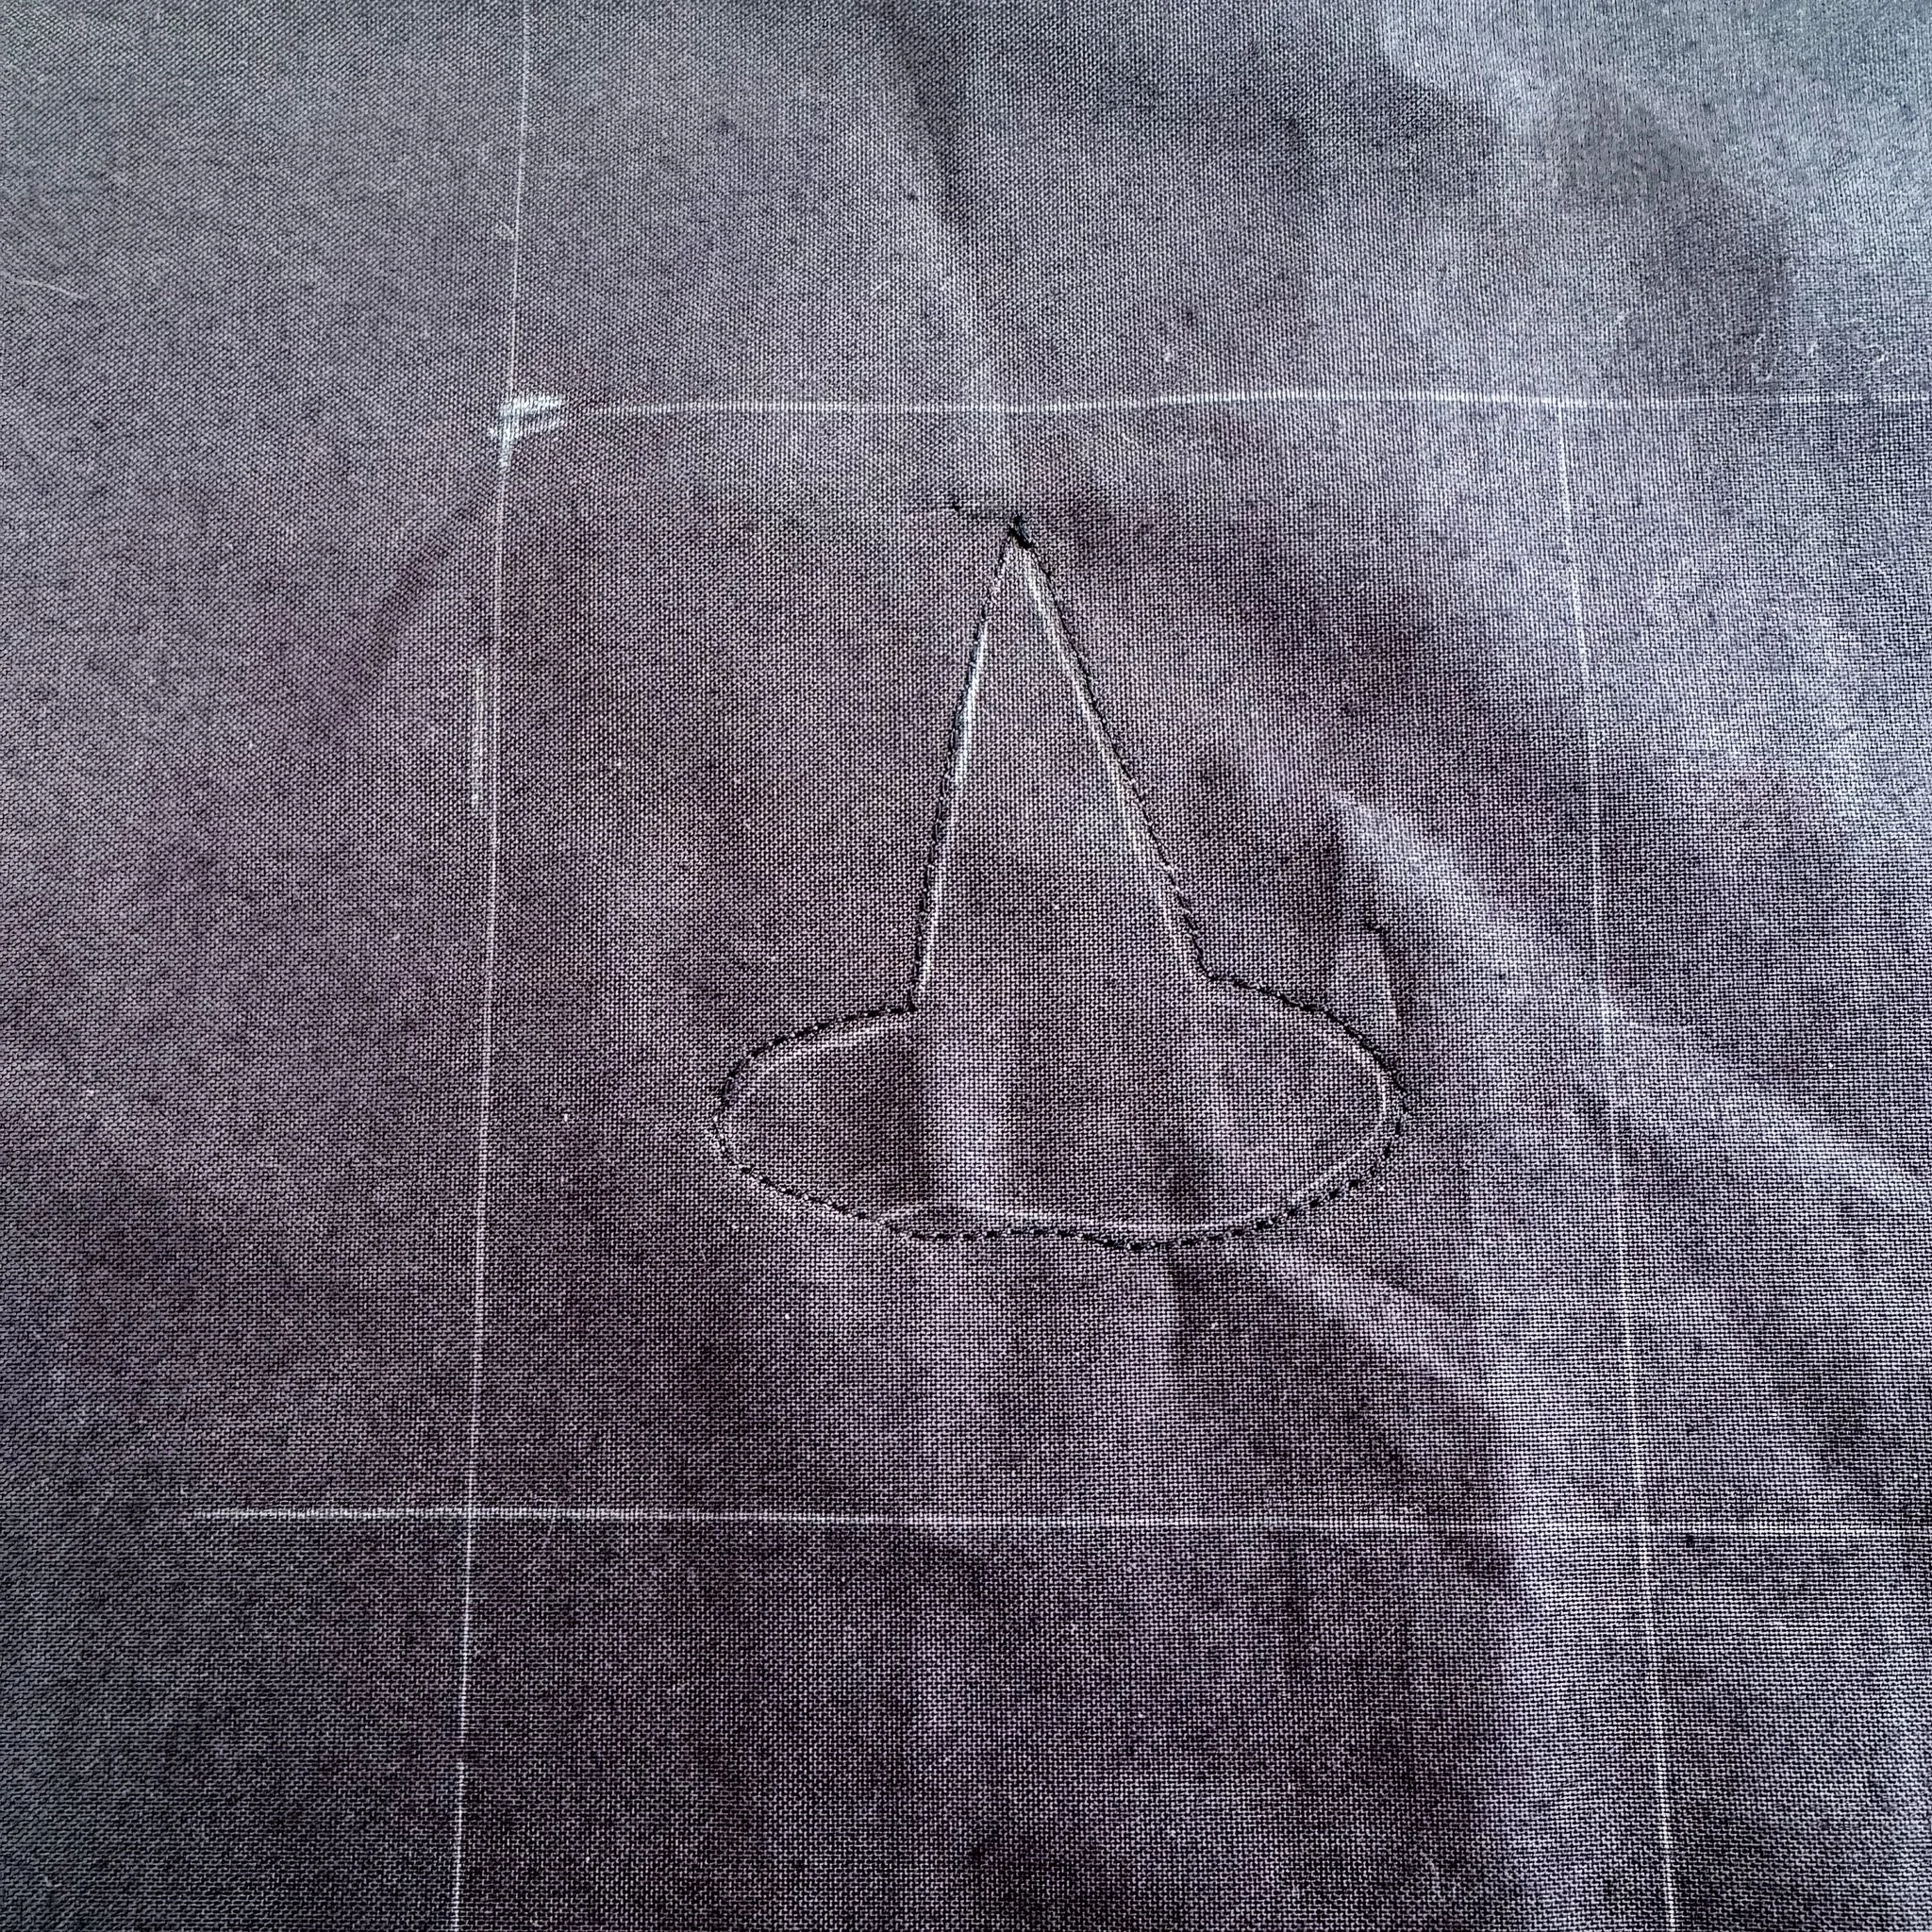
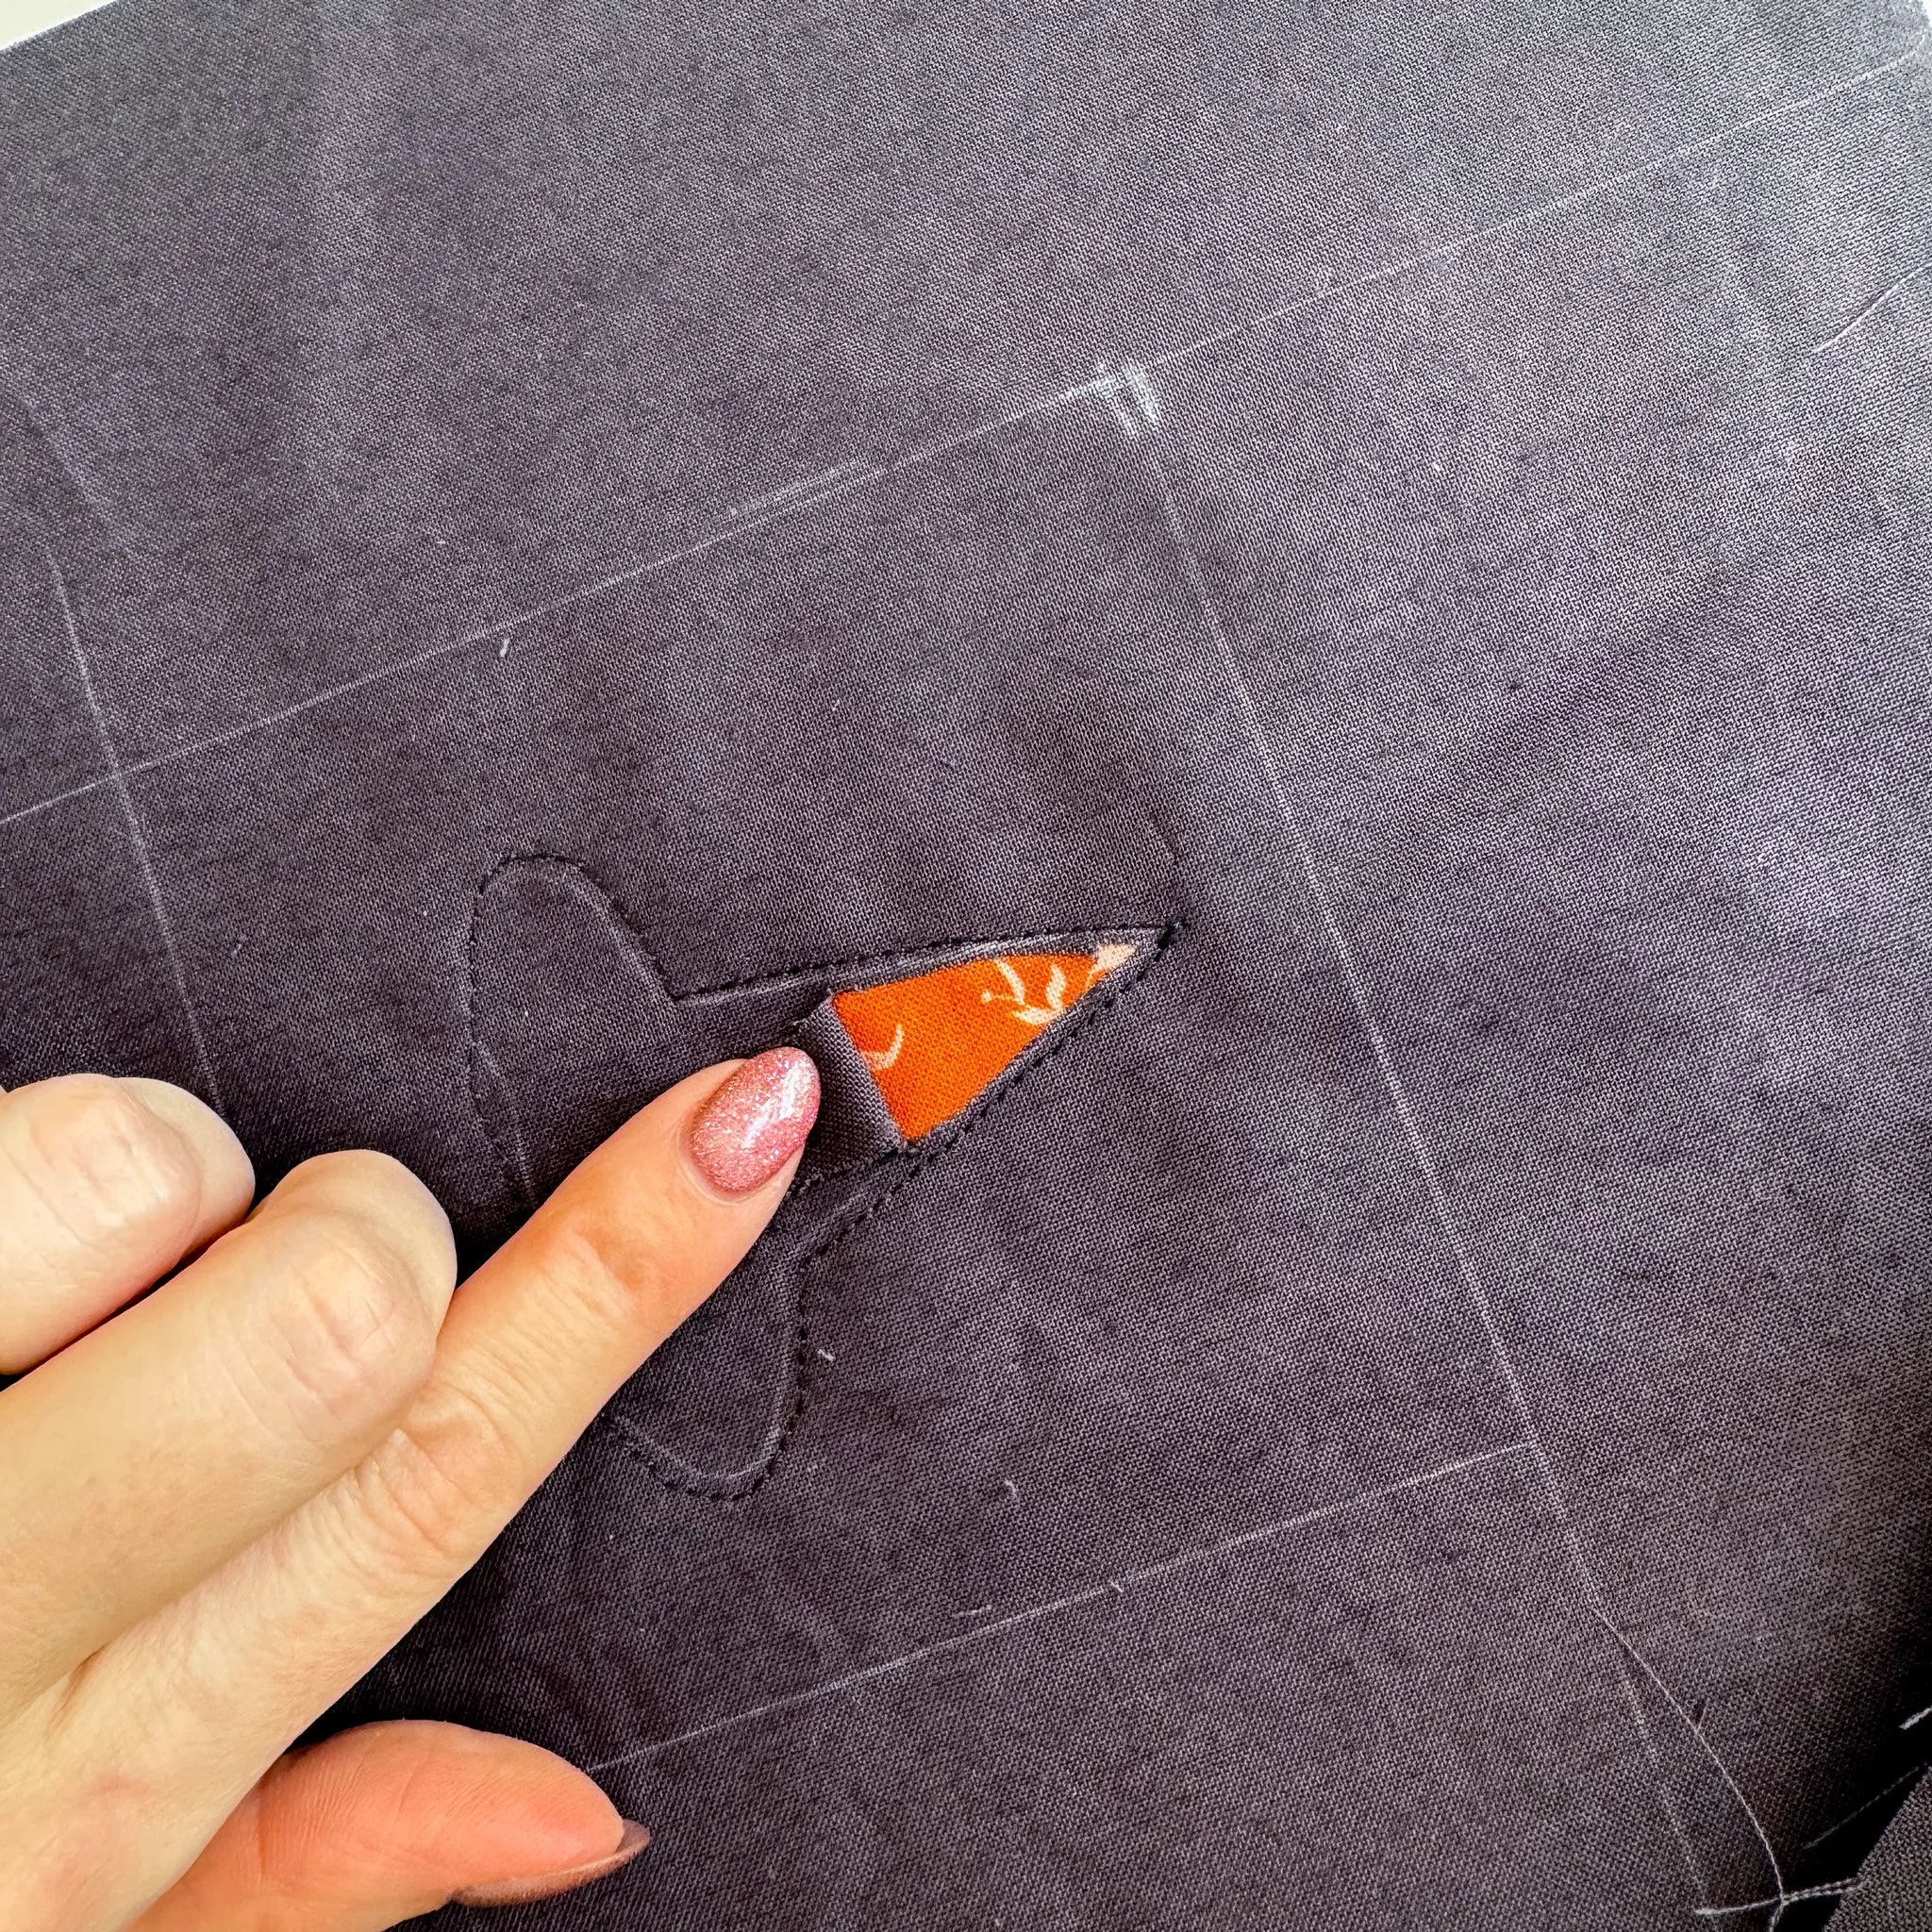
Step 6: The Magic Part (Cutting It Open)
This is where it all comes together!
Make a small slit inside the stitched shape on the pillow front - I do this using my seam ripper, very carefully to avoid cutting the hat fabric underneath. Then carefully cut away the top layer of fabric inside the stitching line to reveal the fabric underneath.
Take your time here; tiny scissors are your best friend!

Step 7: Repeat
Repeat the layering, stitching, and cutting process for each hat.
Step 8: Quilt + Finish
Once all your hats are revealed, baste your pillow top with batting and backing. Quilt however you like, then turn it into a pillow cover! I particularly like making envelope-style pillow covers, because they’re so quick and easy.
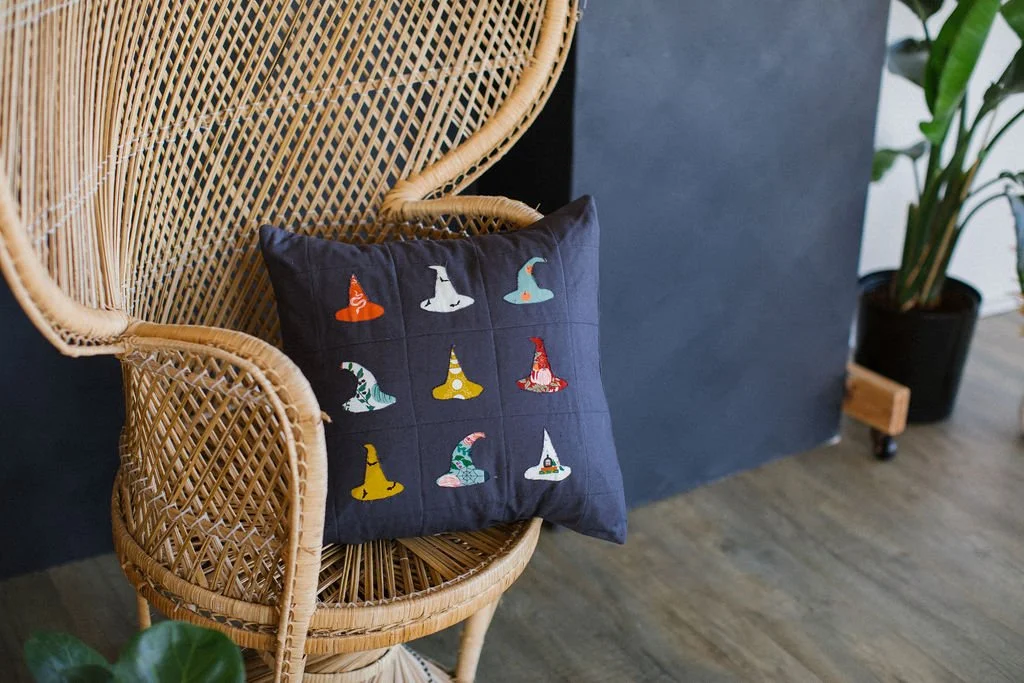
And that’s it! A super fun project that looks just a bit different, and harder than it really is.