
Coda Quilted Coat: Part 1


Welcome to Part 1 of the Coda Quilted Coat SAL! In this post, we will be determining our sizes, cutting out pattern pieces, making size modifications if needed, and making a toile to check the fit. For other posts on the Coda Quilted Coat, visit this link. Note that the Sew a Long posts require the Coda Quilted Coat Pattern.
A Note About Batting
Batting is optional in this coat, though without it you won't get the same nice quilted texture. I suggest using a batting with a really nice drape that isn't too stiff. Bamboo and Silk batting would be ideal for this coat; an 80/20 cotton poly blend would work well too. I would suggest staying away from 100% cotton batting for this coat, as it has a tenancy to be more stiff. If you really want the softest coat possible, you can also try using a layer of fleece instead of batting. I personally used Hobbs Tuscany Silk Batting for my coat and loved it!
If you are located in a warmer climate or are looking for a lighter weight coat, you can absolutely forgo the batting entirely and use a fabric layer instead. For my own coat, I knew I didn't want the arms to be too stiff. I was worried I wouldn't get the flexibility I wanted if I used batting, so I used a leftover knit jersey fabric that I had to give them an extra layer of warmth without sacrificing flexibility. Almost any type of fabric would be suitable for this (though I would avoid anything stiff and heavy like canvas). This is a great opportunity to keep an eye towards sustainability and upcycle or repurpose some material that isn't currently being used!

Pattern Sizing
Choosing Your Size: If you've never made a garment before, it can be a bit overwhelming to look at a size chart! But, do yourself a favor and spend the time to track down a measuring tape. Getting an accurate measurement will be key to making sure you choose the appropriate pattern and having your coat fit. If you've never measured yourself for a pattern before, check out this article to be sure you're measuring correctly.
Choose your size based on your high bust measurement if you are making the standard length coat. The coat is meant to hit at the high hip on the average 5’5” person (I myself am exactly this height, so you can take that into account when reading my lengthening process and looking at photos of my own coat). If your measurement falls in between the sizes, round up.
If you choose to lengthen your coat, check to see if your hip measurement is in line with the size chosen via your high bust measurement. If your hip measurement is larger than the measurement shown in the size chart, you will need to either go up to the appropriate pattern size OR grade your pattern pieces to accommodate the larger hip. Don't worry - we will talk about pattern grading further in this post!
For example, my high bust measurement is 31". My hip measurement is 39", so my upper half is a size XS but my bottom half is a size M (welcome to the life of a pear shaped person). For my first Coda coat, I simply made the Medium version because I wanted a more oversized coat. For my second version, I graded my pattern pieces so that the shoulders aren't quite so boxy on me.

Full Bust or Standard Bust Options: If your full bust minus high bust is more than 4”, use the full bust option on the pattern pieces. Note that "Full Bust" is a phrase used with two different meanings here; in the size chart, the “Full Bust” refers to the largest measurement of your bust line. When cutting out your pattern pieces, the “Full Bust” option refers to a larger bust-to-high-bust ratio, and will provide extra room in the bust for a better fit.
Pattern Adjustments
Length Adjustment: Lengthening or shortening your coat is one of the easiest adjustments you can make to this pattern! If you take a look at Page 6 of the Coda Quilted Coat pattern, you'll see that instructions are given for lengthening and shortening.
To determine how much you may want to lengthen or shorten your coat, first take a look at the Finished Measurements chart of Page 5. You'll see that the Center Back length of the coat is 22.75", so that's the starting point you're working with for the finished coat measurement.
Next, decide what you want the final length to be. This can be a bit tricky since the finished length is discussing the center back of the coat and we tend to look at the fit in the front of a garment when we're getting started, but in my experience I just make my best guess at where I'd like my coat to hit using a measuring tape.
Finally, follow the instructions on Page 6 to add in the appropriate amount of paper to increase your pattern length for the front and back pieces.
For example, I made a rough estimate that I'd like to increase the measurement of my coat by about 4". I did this by looking in a mirror at where the pattern measurement would hit on my back and hips. Then, I added a 4" strip into my pattern pieces. I also made one additional adjustment, and curved the bottom of my coat another inch or so lower. You can read more information of how I curved the bottom of my quilted coat in this blog post.
Pocket Adjustment: If you adjust the length of your coat, you may want to adjust the pocket length as well. There are a couple of ways you can do this; you can simply add the amount of length you added to the front/back pieces to the pocket piece, or you can eyeball it (which is what I did). I wound up with a 9" deep pocket piece after playing around with holding my pocket pattern piece up to my adjusted coat front piece, and seeing where it felt right to begin. I also knew that I wanted a deep enough pocket to easily hold my phone, so I took that into account.
Slope Shoulder Adjustment: If you know that you tend to have more sloped shoulders and have run into trouble fitting garments, check out this tutorial on adjusting pattern pieces for sloped shoulders. Be sure to watch the video!
Mastectomy Adjustment: If you've had a mastectomy and are wondering how this may change the fit of your homemade garments, there are some excellent resources out there for you! After doing a bit of research I don't believe that the Coda Quilted Coat will require much if any adjustment for those who have undergone a mastectomy, but if you're interested in learning more about the options I would suggest checking out this tutorial. In addition, Twig and Tale offers mastectomy adjusments included with their patterns, which is just awesome!
Pattern Grading: Pattern Grading refers to the process of adjusting patterns for different sizes, and can sound very complicated at first! However, this coat is a great place to practice some minor size grading if needed. In this case, we will be looking at how to grade a pattern when your different body measurements work out to different sizes - particularly the bust and hip measurements.
In my own example mentioned above, my underbust size is XS and my hip size is M. Previously I made the M size coat, which is fine but means it's quite bulky around my rib cage and too large in the shoulders. For my sew-a-long coat, I'm opting to grade my pattern to combine the XS and M sizes. For an excellent tutorial on how to grade between sizes, visit this tutorial. The Coda Quilted Coat pattern also walks you through this blending of sizes on Page 7.
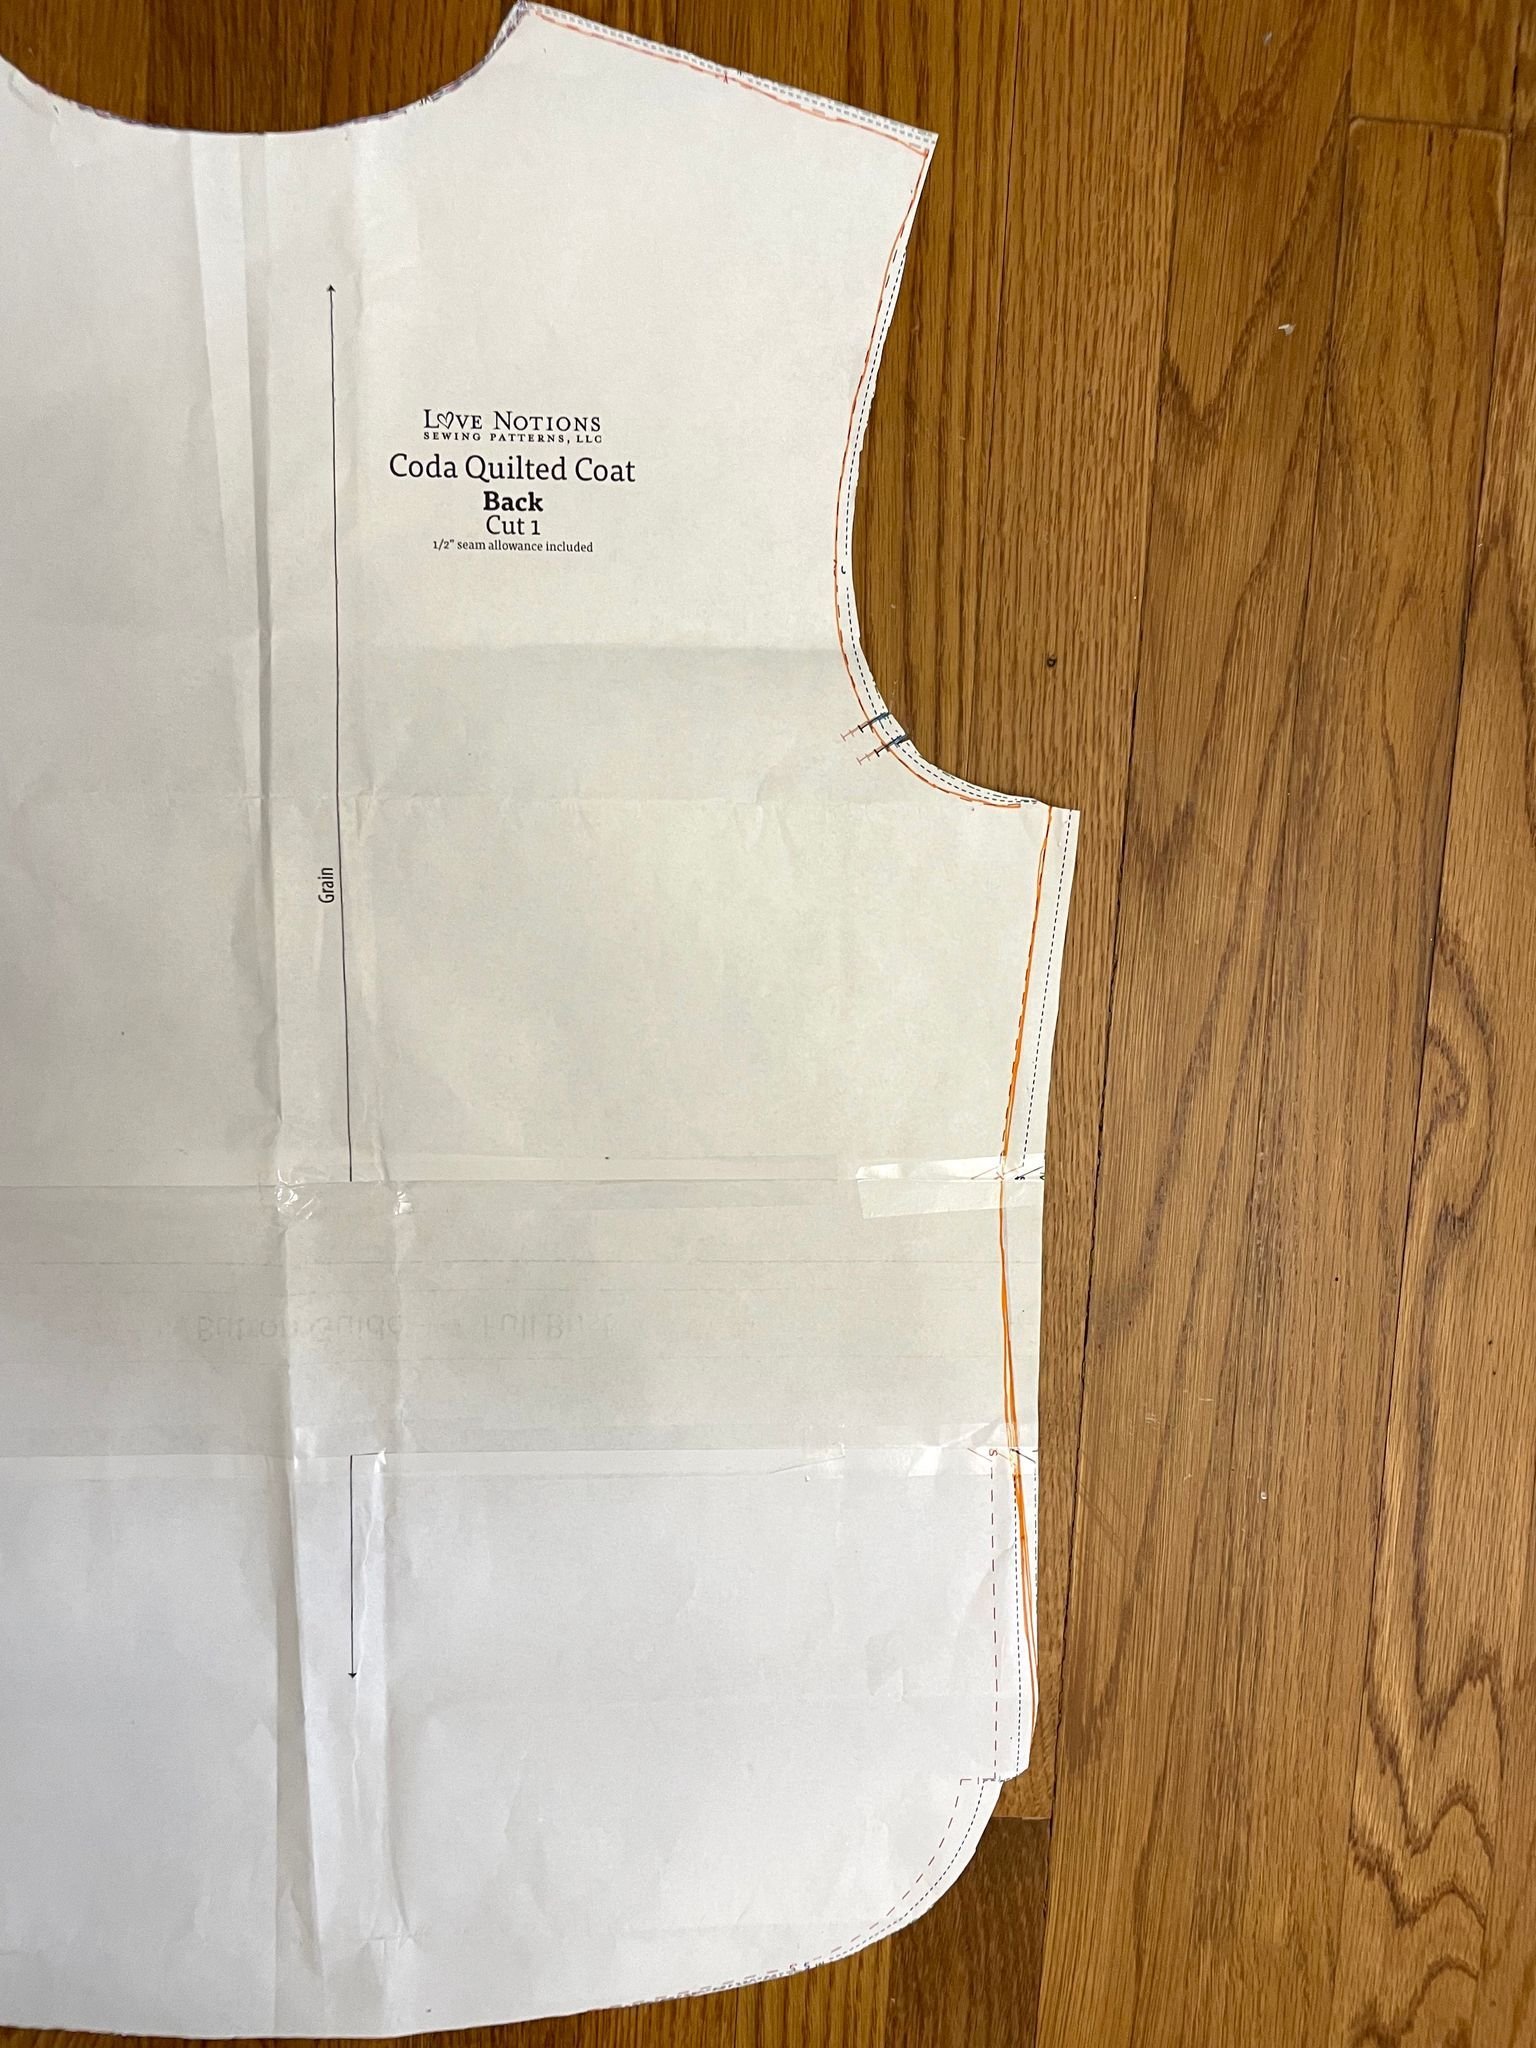
Here's a quick example of how my own grading turned out on the back piece. Now, in a perfect world you'd do the grading before cutting out the pattern pieces, but as I had already cut mine out I just worked with what I had. You can see below that my orange line is where I'm curving from the Medium size at the hip up to the XS size in the bust area. I'll then continue to follow the XS size on the pattern piece around the arm hole and shoulders. I also did some measuring to make sure that the coat would fit well around my hips since I graded to the medium size a bit lower than you usually might; I didn't want a really obvious dip in the waist.
Making a Toile
What on earth is a toile, you may ask? A toile (or muslin, depending on who you ask), is essentially a prototype for the garment you're making. It's a very tempting step to skip - who wants to make a prototype and feel like they're wasting time and fabric - but it's also an important step to get the fit right. I almost always make adjustments to my pattern based on my toile, and have never regretted making one! This article talks a bit more about toile and best practices for making them.
If you're worried about what fabric to use for your toile, it's a great chance to use up fabric that you have that you never think you'll use. If you don't have anything like that laying around, you can pick up some cheap muslin (perfect for making a toile!) for as little as $2 a yard at Joann and similar stores.
For this coat, the toile is very simple. You only need to make the outer shell of the coat to check the fit, so you'll cut out the following pieces:
2 arms
1 back
2 fronts
Then, you'll follow the sewing instructions on Page 11 to construct a basic coat. This will also give you some good practice to see how the coat comes together! I personally wouldn't construct a collar or pockets during the toile step, but if you'd like to practice those techniques you can create those as well.
Once you create your toile and try it on you'll be able to get a sense for if your pattern was sized correctly, and if you'd like to make any further modifications to your pattern piece.